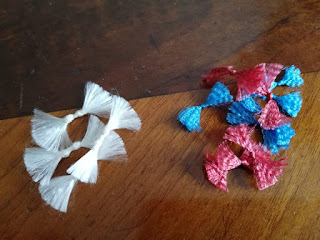
After tracking down some how-to's, I decided to jump into it myself and make some fly fringe for my upcoming rococo projects. I still had silk embroidery thread in various colours whicht I ought to use up eventually because having umpteen colours but just 10 metres each isn't very helpful for embroidery, so better use them for trimming. I figured that measuring 15 centimetres amounts to five tiny silk floss flies with one knot, using six threads of silk. I also experimented with six strand cotton embroidery floss, twenty centimetres for four flies, double-knot, using four full threads.
As the silk thread is well-twined, being meant for sewing and embroidering, it gives this wavy texture, and I have to unpick the threads with a pin before fluffing them up with a hard nailbrush. You can fluff the cotton version to the same fine texture as silk, but it takes much more time to unpick the threads before fluffing, as cotton fibres adhere much more to each other than the smooth silk fibres.
 |
| left: double-knot cotton flies; right: single-knot silk flies |
For making flies if you only have one limited spool of thread and thus can't make and endless string of flies, here's my step-by-step for five flies in a row, using 15 centimetres of silk, allowing thus for 3 cm for each fly:
Cut desired length of silk thread as often as you need to get a fluffy fly. Knot the ends to mark the centre of the first two flies, then place a knot at the exact centre, and between those, two more knots. Cut in half exactly between two knots. Split the threads with a pin, then fluff with a hard nailbrush (or something the like).
 | |||
| the stages of a silk fly |
 |
| silk flies, ready for brushing |
No comments:
Post a Comment