Showing posts with label Victorian. Show all posts

Monday, 17 September 2018

Flowery victorian dress

Not my usual style at all :D The dress was planned for a very young character, hence the girlish look with ruffled hem and flower print.


The skirt consists of three panels with attached ruffle. It can be worn either with the matching blouse or with another of matching colour. There's lace trim at the top of the ruffle, the skirt closes with hook and eye at the back. When attaching a ruffle to a smooth piece of fabric, divide each of it into an equal number of parts, then pin together at the measured intervals and gather the fabric evenly between them. Otherwise with ruching of eight metres or so, you'll inevitably end up with an uneven dispersion of fabric around the hem.


The blouse pattern is a 1970s burda-pattern which fits the style perfectly. I only had to adjust the length of the sleeves a bit and narrow the neckline, as I wanted to have a proper Victorian stand-up collar. And as I had time to finish everything before wearing it for the first time, this blouse even has proper buttons and buttonholes! The visible buttons are shank buttons, the ones that vanish beneath the skirt's waistband are flat ones. I still had mother-of-pearl buttons of both sorts in my stock which fit the cream base colour perfectly. Decoration is also some lace trim along the collar and the yoke, and I even had time for a quickly embroidered initial of the character's name on the button border.

Tuesday, 4 September 2018

How to get vintage leather gloves soft

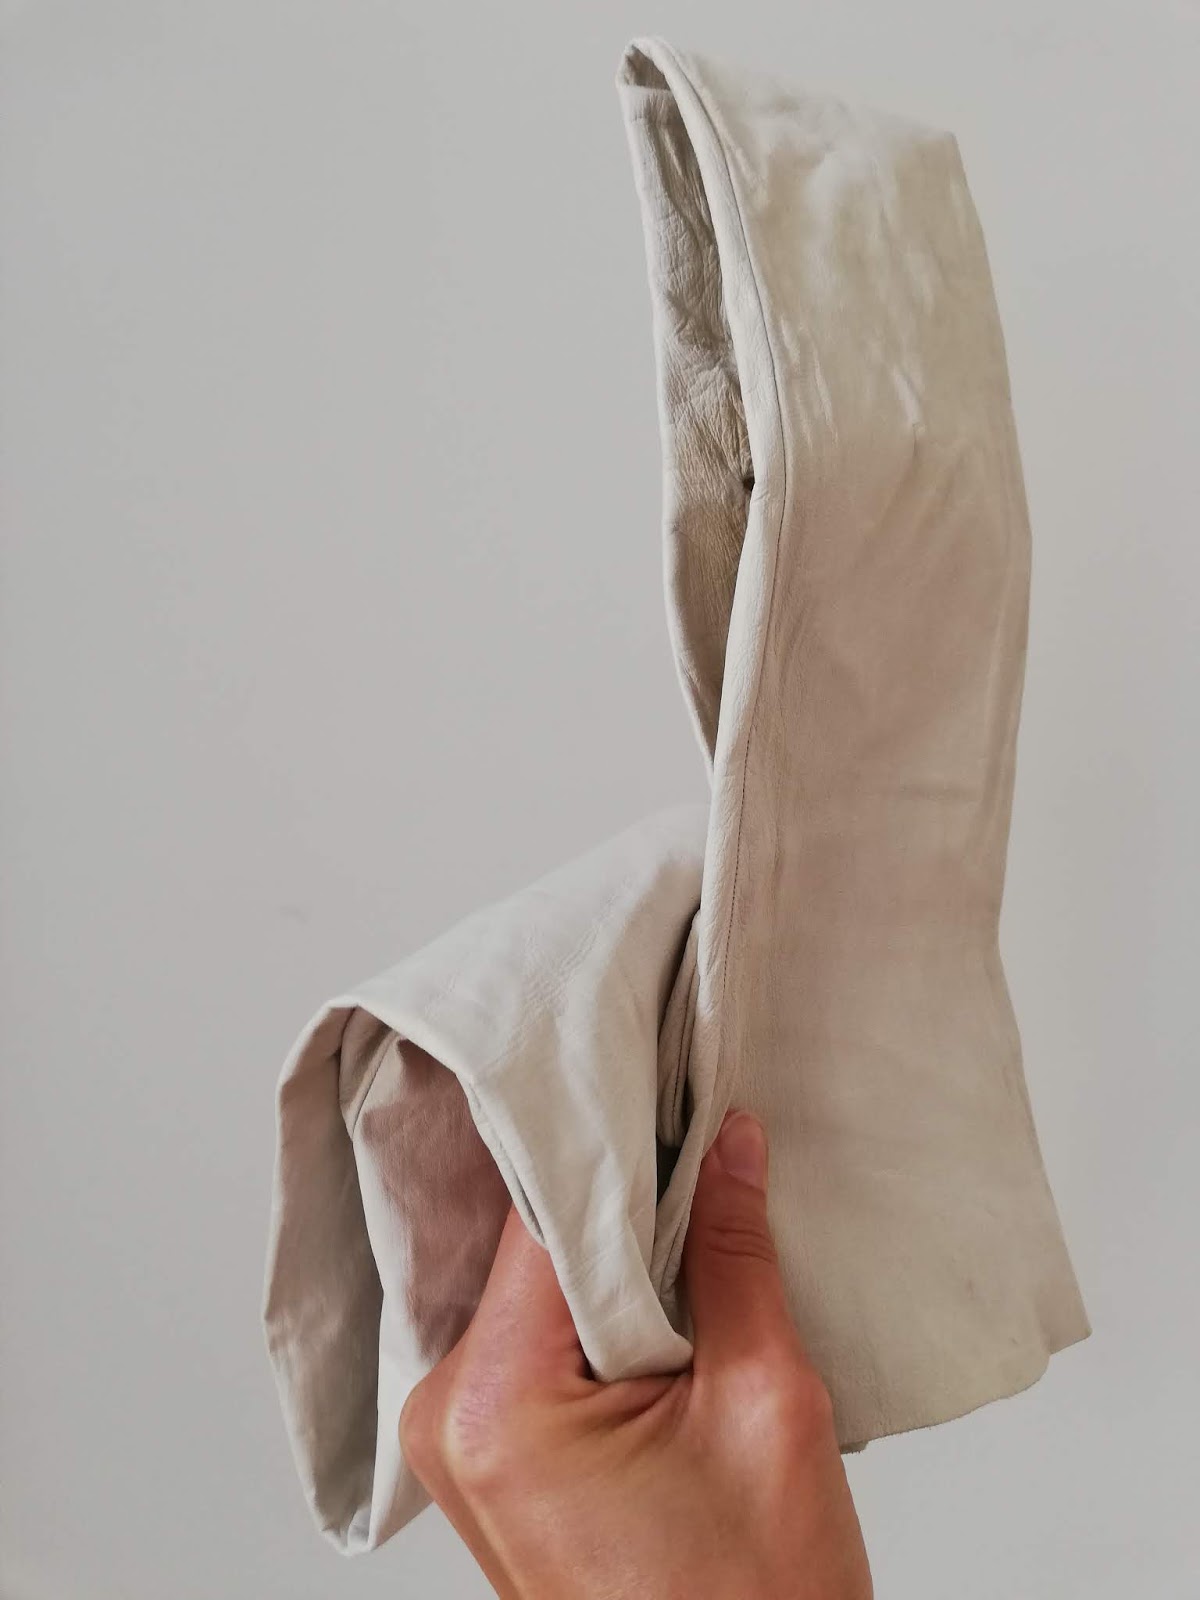
Only once was I lucky enough to find unused vintage leather gloves, delightfully soft and of perfect cream-white colour. Usually you're not so lucky and have to deal with used second-hand pairs that may be discoloured; and I, for my part, prefer to wash them and disinfect the inside if I buy them at a flea market. Even using a detergent specifically for leather doesn't help much, the leather comes out rather stiff after drying. Here's a collection of insights I gained through experimenting a bit.

- In general, leather gloves should be washed while wearing them and gently washing your hands with the gloves on, using a leather detergent. Rinse thoroughly. Squeeze the water out gently, if possible by rolling them to avoid crinkling. Dry on a towel that you change once it's too wet. NEVER dry on a radiator, it spoils the leather and makes it hard!
- To adjust gloves to your size, either widen them with a finger stretcher or the handle of a wooden spoon while still moist. Best thing is to put them on while still moist.
- While drying, put the gloves on several times and roll them to keep them supple and adjusted to the shape of your hands.
- If, despite all your efforts, the gloves still come out stiff and inflexible (especially funny if they go past your elbows and you can't bend them anymore...), turn them inside out and rub them thoroughly with uncoloured hand lotion or lanolin to replenish the missing grease in the leather. DO NOT use leather care grease, as it's usually yellowish and may discolour your gloves. Some gloves can also be greased gently on the outside, but you'll have to try. NEVER grease suede gloves from the outside!
- If you wear white leather gloves at a ball, don't let sweaty-handed partners touch your gloves without gloves of their own, the sweat discolours the leather (which is basically what must have happened to my extra-long pair).


And this happens if you rub a glove with Via... :D - well, this happens if your gloves come out with the rigidity of cardboard after washing and you have to treat them with hand lotion. Left one thoroughly lotioned from the inside, right one not. They became perfectly supple again, adjusted to my hands and let me bend my elbows. What more do you wish for! Well, they could be a little cleaner, the palms being really greyed (see sweaty-palmed-partner-problem above). I'll figure that out one day...

Monday, 11 September 2017

Hat decoration...

...or: How to turn something incredibly horrible into something more credibly horrible :D

Having a pencheant for fleur de lys, I just had to buy this masterpiece of glittery madness (who the hell invented sticky glitter?!), plucked off the silly ribbon and the plastic rhinestones, scratched and sanded the glitterglue off, changed the position of the metal ornaments, and lo!, it can easily serve as hat decoration now - though I'll more probably use it for a rococo tricorn than for a baroque cavalier hat.


Glittery madness before
De-glittered ornament after

Wednesday, 27 April 2016

Late 19th century necktie made from ordinary silk tie

So I happened to stumble over a bunch of really low-priced silk ties with patterns that would suit late 19th century. And because I have a male character up my sleeve that I'm playing every now and then (usually when I know there's gonna be a lack of gentlemen at a ball), I bought one of each pattern. As I said, they came at an irresistably excellent price...


Just the shape doesn't suit at all... So what's there to do but unpick them and give them a new shape! Usually you can make a necktie and a bowtie from one ordinary tie. Here's how to:

Unpick the hand-stitched back-seam all along. Cut away all loops and hindrances and take out the inlet. You'll end up with something like this, an outer shell with pieces of lining attached, and the thicker inner fabric:


You'll notice that the outer shell of a tie never comes in one piece but in two or three joined together. Unpick the seam closest to the slim end so you get a larger, broad and a shorter, slender piece.


The borad piece is going to become your necktie, the slim piece will be used for the bowtie.

Update to come, currently busy with baroque...

Tuesday, 26 April 2016

Attempts in victorian hatting

There is one fashion problem especially in Victorian liveroleplays: a lady would never leave the house without a hat. And with your outfits improving you will want more sophisticated headdresses, matching your dresses, instead of one decorated straw hat for all purposes. I have so far tried four different patterns.

Of course I started with the most difficult one: a top-hat. The shape was entirely modelled on a mould. The inner layer consists of stiff interface joined with paper glue as it remains flexible when dry and doesn't smell. It's not the best solution, though, as it takes long to bind with the fabric. The cover was made from brocade matching the dress, sewn and then glued and stitched over the basic shape. I prefer a combination of glueing and sewing to just hot-glueing everything. It allows for much finer work and looks better. I'm a nerd when it comes to details...

The second type of hat I tried was a nice little hat to sit over the forehead so you can wear your hair taken up at the back - which usually gives you trouble fitting a hat on top. This has become my favourite shape now, as it can be decorated and modified to fit the dress: wider brim, higher top, folded up like a tricorn, loaded with flowers, plain with ruffles, anything goes. When using the pattern, keep in mind to add about a centimetre seam allowance at the inner side of the brim and at the top of the crown when you cut your material for the basic shape, and to add seam allowance to all adges when cutting the outer fabric. For the outer fabric, crown and top are cut once from fabric matching the dress and once from thin, matching fabric for the lining. Glue the brim to the crown, close it at the back, then glue on the top and cut off excess material (it never fits perfectly). The brim is cut twice from dress fabric and joined at the outer seam. Top and crown piece are joined, both go over your basic hat and are glued in place, then joined along the crown where the hatband will cover the seam. The lining is glued in in some places and joined with the outer fabric. Add hatband, decoration and a few small loops for hairpins, or just use a hatpin to keep your dainty little headdress in place.


Here are the example pictures of my blue velvet hat.

Only the inlay is glued, the fabric is sewn, in many places by hand. I usually use buckram or cardboard. Do abstain from using hot-glue anywhere on your hat, even for the decoration - you will never be able to change anything or correct mistakes. These days, hot-glue is used for almost everything instead of using the proper methods. I used book glue (which remains flexible when dry) to join the fabric layer and the cardboard and shaped the brim by letting it dry pinned up.


The lining was finished by hand.


The three sides had their shape already by glueing the fabric in, but after attaching the hatband and the decoration, they were fixed to the crown with a few stitches.


 The plume easily gets its shape from an ordinary curling iron. First, get the quill in shape to sit nicely on the hat, then curl the ends.


This is the finished specimen: A tricorn, covered in blue velvet (same fabric as the dress), lined with blue art silk and decorated with a shaped plume and some golden flower-berry-thingy.


The third and fourth pattern are the easiest ones, they're almost flat and are basically just a platform for your decoration - ruffles, lace, flowers, bows, and plenty of them. Cut the shape from cardboard or any other stiff material and overlap the slit about a centimetre or two to get a 3D-shape. Cut your fabric a bit bigger than the basic shape plus seam allowance, join it with the lining (which should be smaller than the basic shape) but leave a slit big enough to slip in your hat. Glue in some places (through the slit) so your fabric follows the shape of the hat-base. You can also help with a few stitches in places that will afterwards be covered by the decoration. Close the slit and decorate. Also here, either use a hatpin or sew two or three small loops for hairpins.

Pattern to come...

Thursday, 28 January 2016

1880s dress of blue velvet - day dress and evening bodice

The blue velvet skirt may look familiar - it's the one from my egyptian style dress. I still had so much of this blue velvet left that I decided to make another high-necked bodice and, playing pattern-teris once more, even squeezed in an evening bodice to go with the skirt. Always nice not having to change the entire outfit when a lady is busy plotting and solving mysteries!

Again the pattern of the day bodice follows the one I have already used several times - only this time I think I didn't add enough fabric for the button line, so the bodice fits very snugly, no chance of wearing it over a blouse as a jacket. Well, or maybe just a very thin blouse :D The buttons are, again, rather small and of a pale golden colour. The standing collar is only half the hight of the egyptian one's and closes with an additional hook and eye. It was the best solution for following the high-necked fashion of the 1880s and still show some lace underneath. And I'm still musing over additional decoration...

The pattern of the evening bodice is the one I had altered for the embroidered ballgown, the neckline this time being a little higher as there won't be any bertha and even for an evening gown it would have seemed too naked. That's also the reason why I added small sleeves roughly based on the pattern I used for the puffed sleeves of my white regency ballgown. The decoration will be black lace and beading once I find the time to go shopping.

The hat follows my new favourite pattern that I created in an hour of boredom because I couldn't find any decent pattern online.

Wednesday, 30 December 2015

1880s ballgown of embroidered silk

This is kind of a "Scarlet"-dress in three ways: firstly, the main fabric actually was a curtain that, secondly, is Irish because I bought it in a little second-hand store near Dublin, and is, thirdly, scarlet ;) Not that I'd particularly like that pigheaded priss, so it'll rather be my Ireland-gown.


I miraculously found matching fabric for underskirt, lining and decoration immediately - that's good because a week ago I was given the date of our upcoming victorian ball, which is not far into January. So I hastily put aside the umpteen-thousand marguerites for February baroque and whisked that dress through the sewing machine. This is what the internet offered as inspiration:


As an option I even found perfectly matching trim in my neverending store!


Wednesday, 25 November 2015

Cabochon jewelry

Pretty simple once you've gathered all the ingredients, like frame, glass, glue, and pictures. The glass covers come in flat and convex. If you're using convex covers, only choose landscapes, flowers or anything neutral as your motif. Portraits only go well (i.e. undistorted) with flat glass, and you don't want your fiancé at twice his breadth on your necklace ;)

The trickiest thing is to avoid bubbles of air when you glue the images to the glass. I find it easiest to put a generous dollop of glue on the flat side of the cabochon, press the picture onto the glue and wiggle it very gently until it has spread the glue all over the glass and lies down flat. Dry on a flat surface (some hours will be enough, I just leave mine overnight), cut away the excess paper and glue to the metal frame.


The simplest way of wearing them would be to attach them to a piece of satin ribbon or a slender metal chain, or you can attach them to any pearl or bead necklace, lace ruff (expecially for rococo), or whatever you fancy.
 

 For a rose quartz version I also added a matching pendant, the beads are rose quartz and crystal.

A very nice thing is a two-faced version. Take two pieces of the same foundation style and very diligently glue them back to back with some jewellery glue so they're absolutely apposite. For the front picture, proceed as above, with a rounded cabochon and a nice picture. For the reverse side that is to remain hidden when worn, use a flat cabochon so the pendant won't turn but remain nice and tidy with the flat side down and the convex side up and you can keep your secret lover's picture nicely hidden ;) If you're in a hurry and there are no flat cabochons at hand, it also works well with a piece of clear plastic cut into shape to cover the picture.

Sunday, 5 July 2015

On starching fabric

I never knew it would be that practical! But after trying every theatre-trick from heavy fabric and wired seams to iron-on interfacing to get nicely shaped collars and all, I decided to use old-fashioned starch. My only experience so far has been with potato-starch, but it worked nicely and I didn't discover any disadvantages so I guess I'll stick with it. The starch-water-ratio may vary, depending on the size of your spoons and the thickness of the starch you want to produce, but all in all it has proven best to make some heavy starch basis that can be diluted to get the desired mixture.

1 litre of water
4 teaspoons (!) of starch (NOT tablespoons; you'll end up with a bowl of goo)

Mix the starch with some cold water. You'll get a whiteish puree. Pour in the cooking water and stir well to avoid the forming of lumps which you won't want to sit on your fabric. The white starch will turn into a rather clear liquid. If it's still too gooey you can add water until you've reached the desired consistency. If there are too many lumps in it you can put it through a fine sieve before putting in the clothes.

Put the damp fabric into the starch for a moment, squeeze the excess water out gently (you don't want to end up with wrinkles in your collar) and lay the piece flat, allowing excess water to drip off. Dry it quickly, either in the sun or on the heating, and when it's only damp, iron it into the desired shape.

PS: It even worked very well to get the crispness back into tulle that I had had to wash, as well as into dupion silk that had turned a little limp after washing. And if you use too much starch, you'll be able to design an origami dress... ;)

Sunday, 3 May 2015

Two victorian aprons

After so many costumes sewn for nobility and so many high-class characters played, one of my latest characters is a victorian housemaid on her way to becoming a lady's maid. That means plain costumes - and frilly aprons. The important thing with this kind of aprons is that they usually come with a bib, not just the skirt-part, and that they usually aren't pinafores anymore but are tied.

The first apron I made is a very plain one, for cooking or gardening or other dirty work, made from unbleached cotton . The skirt part is plain with two pockets to be tied at the back and has three buttonholes at the front for the bib which can be buttoned on. The straps cross at the back and are buttoned to the apron strings. And as I saw this in many pictures and documentaries I made a pair of protective sleeves from the same fabric, they seem to have been very popular in those days to save your clothes from stains.

The second apron is decorative, made entirely from light, machine-embroidered cotton fabric. The bib is attached to the apron, again the straps cross at the back and are buttoned to the strings. For decoration the straps are completely lined with ruffles.

Tuesday, 29 April 2014

1880s day dress of white wool

At last a soon-to-be-finished project! I've worn it a couple of times already - thanks again to the inventor of safety-pins! It's made of cream-white wool with diagonally woven-in stripes which invite the avid seamstress to toy with the pattern.

The skirt consists of eight panels instead of the usual six, as I wanted the front and back to show an even zig-zag pattern.

The front of the overskirt is draped as an apron typical for the early 1880s, the back is longer and leaf-shaped. The pleats are secured to a little yoke hidden beneath the basque of the jacket to fall evenly over the bustle.

The jacket was actually intended to be a bodice with a small standing collar, but I miscalculated and the thing turned out too small to close all the way up to the neck, so I turned it into a jacket instead, to be worn with a matching cream silk blouse and a brooch to fasten it beneath the bust. It looks almost as if I had intended it! :D The sleeves are just a little puffed, as was fashionable before they became those monstrously huge assemblages of fabric around 1900. And as in so many of my costumes, the buttons are still missing...


1880s dress "Egyptian" style

To fit the occasion of an Egyptian exhibition, I decided to use up the remnants of a blue-gold striped fabric I once used to make an oriental costume and make them into an "Egyptian" dress like a woman of the 1880s would have worn, toying with the resemblance of the fabric to those typical Pharaoh-headdresses.

The skirt is made of matching blue velvet, 6-panel pattern with train that can optionally be tucked up over the bustle.

The overskirt is going to be an asymmetrical arrangement of that striped fabric. In the beta-version, I just pinned it to the back of the skirt to form a of decorative backside.

The bodice is based on my newly-made perfect pattern ;) , this time high-necked (standing collar of blue velvet still to come) and with long, narrow sleeves (blue velvet cuffs still to come). I wore it with a white blouse that was a complete improvisation ten years ago but still is of excellent use, and it turned out those lace-rimmed ruffles and jabot look really nice with the blue, so I guess I will keep it!

The turban - well, THAT was a complete improvisation. After finishing the skirt and bodice, I ended up with some scraps of fabric and the need for a hat (as every decent Victorian lady needs one), twisted and rolled them, put in some random stitches (yes, really random, it was kind of "lets sew something together and see what the outcome may be") and decorated the thing with golden paper leaves and a small peacock feather. It definitely served the purpose! And in Victorian times they wore all kinds of weird things on their heads anyway...


Thursday, 30 May 2013

Striped 1870s summer dress

I've had this dress in mind for a couple of months already, and now I finally found the right fabric: blue and white striped cotton, light enough for making ruches but not too flimsy. Trimming will be red satin ribbon and white lace.


The pattern will be merged from several period patterns, as I couldn't find any that perfectly fitted what I have in mind.

The skirt is made of four parts, an alteration of a six-part skirt pattern. I didn't want too many seams with those stripes. The front part is rather flat, the side parts half-pleated towards the back, and the back part, which is the largest because it has to cover the bustle, is heavily pleated to keep the pleats in place (i.e. keep them from slipping off the bustle sideways and having bulky sides and a flat bum). So far the skirt is almost finished, the pleated ruches took me a full day or two, but I think it was worth it ;)


And here a close-up of the trim: the satin ribbon goes through the holes of the lace, which fits much better than the previous idea of using a different lace and making it into a frill. Less work, better effect...


What's still missing: the bodice, and a hat. And if there's still fabric left (I'm not even halfway through the six metres I bought, so there will...) I might try my luck and make a matching parasol.

Yay me, the skirt is finished! A quick glimpse, the light isn't very good, but anyway... ;)


I seem to need the pressure of upcoming events to finish things... But it also helped that I took the pains of making a perfectly fitting pattern for a Victorian bodice - which I can now adjust to whatever style I need! A great help indeed. And this done, I eventually finished the matching bodice. Lots of frills and fiddling, but the outcome was worth the effort. All that's now missing are the white mother-of-pearl buttons, I haven't been able to find the right ones yet...