Showing posts with label Baroque. Show all posts

Thursday, 1 March 2018

Black 1660s gown

Death being a big part of life in those days, and my character already being widowed once, chances are high she has one or two mourning dresses in her wardrobe (well, in her case more like ten or so). Again I followed the 1660s pattern but I think I'm tiring of it, and there are enough mid-1600s dresses in my collection now. Off to new horizons! Anyhow, this dress is made of black satin of unknown material, most likely some mixture of natural and artificial fibres. Drapes very nicely. Actually there's a black chemise to be worn beneath it, but I was in such a hurry before the event where the picture was taken that I forgot to pack it, so it looks a bit bare (as far as five metres of fabric can look bare).


And after four attempts with the pattern I've finally figured out the perfect way of sewing in the hooks and eyes :P The trick - at least with my sewing machine - is to take off the presser foot, put the stitch to buttonhole end-stitch and place the presser manually along the halves of the ready-made hook and eye closure where you want the needle to sew. And in the case of this particular dress pattern: work the stiffened interlining, sew upper fabric and lining (NOT the interlining!) together at the front only, place it over the interlining and zig-zag the lining in place along the front, leaving the upper fabric loose.

Upper and lining sewn, just lining zig-zagged to interlining.

Pin the hook and eye stuff to the lining + interlining very neatly so the closures are even with the edge. Sew on leaving the upper fabric untouched - you don't want all those stitches showing on your top layer. 
Top layer folded back, closure exactly along the edge

Eyes pinned, upper fabric untouched
Hooks sewn (left and right of the hook and once in between)

Then, only when the closure is sewn onto lining and interlining, you can either sew the neckline of lining and top layer from the back and turn over, or pin it from the right side, fold the upper fabric over the neckline and sew it by hand. I do the latter with the bottom front that goes over the skirt to smooth out all creases.

Ok, maybe I'll have to do yet another 1660s and take pictures of this process, using a fabric that's not black on black...

Proper pictures at last, this time WITH chemise (and himation, as the second ball's motto was "Olymp" and my charakter Eurydike). The himation is just a rectangle of fabric 2 x 1,50, black ribbon sewn two-faced all around the edges, pinned to shoulder and hip, pins hidden under lavishly layered bows (to use up the godforsaken ribbon that I really came to hate while trying to get straight seams with this stuff).


Monday, 26 February 2018

Baroque stage dress "la France"

I've long had in mind making a dress based on the king's outfit in the 1993 Three Musketeers closing scene, meaning a combination of blue and gold, just never found a reason why my character should be wearing the royal colours. Well, I was dancing "la France" at the the last baroque ball, which was just as good a reason as you can get! Of course I've already had the intended fabric at home for some years, just no precise idea about the exact design. Well, I had to make up the decision pretty quickly, the main ballgown was finished three days before the ball, so I had three days for this dress. I whipped up a design based on my renaissance bodice with split, lined sleeves that took me one and a half hours each, aided by some gin tonic. Here's a teaser pic of the beta-version which was good enough for the dance and stage fight of la France against l'Espagne. Still lots of details missing, but surprisingly people loved it. Looking forward to the finished version though ;)


Thursday, 25 January 2018

Black early baroque jacket

This is yet another original pattern I wanted to try and fit to my measurements to have it in store for quick projects. It's black for the simple reason that I had some black leftover fabric at home, the rest in my external storage was out of reach when motivation hit me. The pattern is the embroidered jacket from Nora Waugh's "The Cut of Women's Clothes". I re-scaled it and modelled it to my measurements by adding another seam to the front, as I intend it to be worn without corset.


The pattern is pretty simple to make, just the gussets were a fuss to sew in, ten of them including the lining. And the sleeves need more fullness than the measurements given in the diagram if you don't intend to embroider them. I stuck to the pattern with completely unshaped sleeves and they do look fine despite my doubts at the beginning. Weren't it for the gussets, this would become my staple three-hours-and-done-jacket. Guess I'll merge this pattern with the one from Holkeboer's "Theatrical Costumes" for another project.

Sunday, 14 January 2018

Purple baroque dress

Found nice fabric, needed a gown for my third baroque character, a huguenot noblewoman - perfect coincidence. The fabric is a medium light cotton weave, warp in black, weft in purple, which makes a nice but not too bright colour, perfect for a young huguenot woman who might dare to risk a bit more colour but not stray too far from the usual dark colours.

The skirt has a circumfence of four metres, and as the fabric was just half width I had to add a good measure at the bottom. The decoration of three rows of velvet ribbon makes this hardly noticable.

The bodice is based on a crossover between an original 1630s pattern from "The cut of women's clothes" by Norah Waugh and the early baroque pattern from Holkeboer's "Patterns for theatrical costumes": instead of the tedious but authentic method of inserting darts along the hip section to gain width, I used the Holkeboer version of curved lines instead of straight, but without the stomacher, closing like the original with a high neckline. Also decorated with velvet ribbon and closing with matching bows. In this version I went for very full sleeves. And the tedious gores avoided, this can indeed become the staple two-hours-and-done-bodice.

Tuesday, 5 December 2017

Pomander

As I found some nice ball pendants that can be used for making pomanders, I decided I needed one. Or more. The first one sold quickly at the historic market, so quickly that only a blurry picture could be found because I forgot to take a decent one. It's artificial pearls, four joined on a wire, and a dark red one with silver ornaments between the white pieces. They should be long enough to go round the waist, the scented ball being slightly below your knees. The top end finishes with a hook to close around the waist with one of the joints between the pearl segments so it can easily be adjusted.

The second pomander in blue and gold, commissioned work.

A third one is made with black and silver filigree pearls between the white segments, ending in a cross-shaped pomander pendant.


The fourth one (yes, it becomes slightly addictive...) is with red pearls again, this time with golden ornaments and a golden scent ball, a similar one in blue and gold, and no end in sight, just diversification, growing more and more elaborate with experience and better sources for pearls and ornaments! One needs a matching pomander for each renaissance gown, after all.


How to make one yourself: You'll need white pearls as basis, .8 mm wire (brass or silver-plated; don't use iron wire, it's going to put on rust eventually), a ball pendant for the lower end and a matching hook (can also be self-made from stronger wire) for the closure. String three or four white pearls for the segments and coloured individual pearls with ornaments for the decorative sections, and join them in a nice, regular pattern.

The latest one with bigger pink beads and rhinestone-bling on the pomander - the lighting was bad, the hour was late, new pic to come... I love the filigree closing hook of this one!


If you're not that much into DIY or patience: I'm selling some of these girdles on Etsy ;)

Monday, 11 September 2017

Hat decoration...

...or: How to turn something incredibly horrible into something more credibly horrible :D

Having a pencheant for fleur de lys, I just had to buy this masterpiece of glittery madness (who the hell invented sticky glitter?!), plucked off the silly ribbon and the plastic rhinestones, scratched and sanded the glitterglue off, changed the position of the metal ornaments, and lo!, it can easily serve as hat decoration now - though I'll more probably use it for a rococo tricorn than for a baroque cavalier hat.


Glittery madness before
De-glittered ornament after

Thursday, 5 January 2017

Baroque vine dress

This year's ball motto is "Autumn", so another new dress is absolutely necessary ;) The actual idea behind it is an eccentric mid-1800s-dress that I chose because of the vine decoration:


The decoration will bearranged differently, to give it a more baroque impression, like in this drawing from Burnacini: the grapes and leaves are arranged around the slimmest parts of the costume only.


And yes, this is the dress that had me on the search for glass grapes, or something the like. No point in sticking plastic grapes on a baroque gown, it would look like I was carrying the table decoration on my shoulders :D So these are the grapes that are going on the dress, entirely handmade, to be found at http://godivascreativechaos.blogspot.com/2017/07/artificial-glass-grapes.html


Wednesday, 14 September 2016

Baroque dressing gown and matching slippers

This project has been on my mind for quite some time already, and at last I managed to find two matching fabrics from my stock. The outer layer is iridescent blue polyestre with a yellow sheen and yellow embroidery. Yes, polyester, yucky, but I want to be able to drag the train through the dust without having to pay much heed to it. The lining is yellow jacquard and won't touch the floor. I intend to have this morning gown as a kind of "Oh dear, there's still something going on, allons-y!!"-outfit for the liveroleplays. The pattern is self-made, more towards the end of the 17th century or even 18th century-ish actually.

I wanted the sleeves to be wide to show the beautiful lining (of which I sadly hadn't enough to trim the front opening with). Sticking to the symmetry of the woven pattern, it was a bit of a pattern-tetris to get all parts nicely onto the four metres.

The body has a yoke to which the back and front parts are pleated.

And I had slippers of black fake leather which was beginning to disintegrate, so I stripped them completely, took the pattern of each part and decided to re-make them from my blue synthetic fabric - which is perfect for shoes as it cleans easily. If you wear cotton- or silk-covered shoes, better stay away from all mankind, my advice... ;)


What you keep is: the heels with inner sole, the outer sole, any interfacing still usable (the leaf-shaped thingy in this picture). You take the pattern of the top, the inner leather sole, and the heel cover (the T-shaped piece in the picture).

Don't bother getting the heels off the sole completely, you're likely never get them on properly again. Yust ease them apart (flat screwdriver or something the like) enough to strip the old fabric and glue on the new one. Then use tea-clips or any other small, handy clamps to press the heel to the instep on both sides, hammer the sole firmly to the heel and add some weight (I used dumbbells of 3 kg each) to press them together until the glue has hardened completely. Et voilà, if you didn't spill too much glue where it diesn't belong you'll end up with neat, newly covered heels.


Now for the front part...

Thursday, 17 December 2015

Dark blue 1630s dress

Actually it was the second one I ever made, right after the red one. Dunno why I never mentioned it here. It's already served its purpose very well several times.

Here I went from the original design (that I wasn't too content with) to the design that's closer to the actual look of 1630s dresses. I altered the pattern to this trusty one that closes with hooks and eyes below the bust and has the typical flaps round the high waist. Only here I hadn't discovered yet that actually the skirt should be attached to the bodice beneath said flaps, so the skirt is still separate which has the disadvantage that if the flaps happen to move in a gust of wind or so, one can see the white chemise beneath. Plus worn as a winter version (as the skirt doesn't drag too much) with long gloves and a high-necked blouse, this area around the waist still becomes the least insulated part.


The sleeves are a little longer and fuller this time, and I found really nice, broad lace that has the perfect look. Ignore the limp curls - it was raining when we arrived at the park for our picknick, and curls don't go well with rain :P


© Iam NOther

And here the winter version with longer undersleeves, gloves, and hat. You can't see much of the costume here but I'm so proud of this pic because at last there's one in which I look really good! :D

Baroque jewelry

Thankfully they used a lot of pearls back then, which are cheap and easy to come by if you content yourself with fake ones. And as I also tend to randomly buy all things that look baroque, I have a nice selection of jewelry parts that I can choose from when I design something. Here's an overview of pieces I put together either for my baroque jewelry-case or for sale in my webshop. Maybe you'll find something inspiring for your projects ;)


This is a design you often see in baroque pictures - those short necklaces made of large pearls with a medallion.


The white crystal set was made for the silver-grey renaissance dress (aka "winter dress"). I admit that I'm not 100% sure of this design's authenticity, but it certainly looked good ;) A similar set was made in blue with a medallion and matching earrings.

Wednesday, 25 November 2015

Cabochon jewelry

Pretty simple once you've gathered all the ingredients, like frame, glass, glue, and pictures. The glass covers come in flat and convex. If you're using convex covers, only choose landscapes, flowers or anything neutral as your motif. Portraits only go well (i.e. undistorted) with flat glass, and you don't want your fiancé at twice his breadth on your necklace ;)

The trickiest thing is to avoid bubbles of air when you glue the images to the glass. I find it easiest to put a generous dollop of glue on the flat side of the cabochon, press the picture onto the glue and wiggle it very gently until it has spread the glue all over the glass and lies down flat. Dry on a flat surface (some hours will be enough, I just leave mine overnight), cut away the excess paper and glue to the metal frame.


The simplest way of wearing them would be to attach them to a piece of satin ribbon or a slender metal chain, or you can attach them to any pearl or bead necklace, lace ruff (expecially for rococo), or whatever you fancy.
 

 For a rose quartz version I also added a matching pendant, the beads are rose quartz and crystal.

A very nice thing is a two-faced version. Take two pieces of the same foundation style and very diligently glue them back to back with some jewellery glue so they're absolutely apposite. For the front picture, proceed as above, with a rounded cabochon and a nice picture. For the reverse side that is to remain hidden when worn, use a flat cabochon so the pendant won't turn but remain nice and tidy with the flat side down and the convex side up and you can keep your secret lover's picture nicely hidden ;) If you're in a hurry and there are no flat cabochons at hand, it also works well with a piece of clear plastic cut into shape to cover the picture.

Tuesday, 17 November 2015

Baroque spring dress

My baroque character's name is Marguerite. And the motto of the upcoming ball is spring. So what else is there to do than plan a dress decorated with marguerites! Lots of them! From small to big, strewn all over the dress like a shower of spring-blossoms. It definitely helped that my preferred fabric store suddenly had plenty of lace-marguerites on sale. Finding the right fabric was a more difficult story and involved driving an hour to another fabric store. Well, things you do for your art when you can't spent fortunes on the silk you'd like to buy...


The pattern is, once again, the 1660s-gown from Janet Arnold. No train this time, I don't want to drag the white flowers through the dust. Cleaning the hem will be tedious enough. Funnily the design looked better in my mind than it did once I laid out the flower design on the hemmed skirt. I already feared I'd have to ditch the whole idea. But as it's meant to be more of a show-off costume, I decided I can just as well go a little over the top. Mixing the big flowers with smaller ones also helped greatly to improve the overall impression. Btw the grey satin behind the green taffetta is the grey 1630s in the making. I worked on two dresses simultaneously.


The resulting 117 big and about thrice as many small flowers were carefully pinned to the fabric in a regular pattern, dense at the bottom and lighter the higher up it gets, to create the impression of a shower of blossoms over the whole skirt. They were sewn on during my bus journey to my favourite flea market, but the nice useless things I bought there are a different story. Let me just mention that I ended up carrying home two antique chairs. Among other things. By bus. After having carried them through the city doing more shopping. Fabric shopping...

As always with my costumes there was a not-completely-finished-yet beta-version that I rushed through the machine until five minutes before dashing off for the ball, unkempt, swearing, and with luggage for three. The flowers on the bodice are still missing, as are the ones along the edges of the sleeves, and though after three dresses I've finally figured out the best way of sewing on the hook and eye bands the cover fabric still has to be attached to the front closing by hand. And I ditched the idea of a new chemise completely. Marguerite lace next time... But the overall outcome was good enough so far, and nothing to be ashamed of ;)


The bodice is now decorated with small flowers along all the edges, plus little bouquets of bigger marguerites at the waist. Given the hoopskirt and the petticoat, gaining a little circumfence still won't harm the silhouette.

The chemise is the same pattern as all that go with my 1660s, the lace now taking up the flower motif of the skirt.

I even made a petticoat. Having this very fancy, almost stage-like dress I felt a light-green petticoat would round the whole thing off. Decorated with the remainders of the marguerites, as I bought too many of them, as always ;) The overskirt can now be taken up to reveal a bit of the light green petticoat that mirrors the sleeve lining. I'll have to re-use the colour combination for a victorian dress, with more of the light green, it's really nice but sadly doesn't fit me at all if worn on its own.

And the decorations... Of course there's plenty of artificial marguerites to put into my hairdo, I even found metal ones to adorn the hairpins with. And I remembered I had some bits of lace from my earlier sewing days, and the piece in the shape of a chain of little flowers fittet around my neck perfectly as a choker. Together with plenty of other jewelry for baroque opulence, of course, like the marguerite ring I bought in Paris (in these modern days a girl has to treat herself to some jewelry...) for, umm, well, not solely for this outfit but to a great degree. I fear now I've finally reached the point where I buy not only everything with a fleur-de-lys on it but also all things with marguerites! :D


Thursday, 22 October 2015

Early baroque dress of grey satin

I have four dresses I need for certain plays next year. So it's no wonder I start working on a fifth that I don't really need...

Again it's gonna be a 1630s gown, this time extra-long as you see in the paintings. No lace this time but the typical english ruff for the sleeves and a very fine but plain white collar. The truth is that I was unable to find perfectly matching lace despite my considerable collection. So I'm planning something like this only in a warm grey.


In the meantime I also decided that I would wear this dress to a small historic ball come week. Self-motivation and all... The skirt turned out a little much too long, at least for a ball, and only while putting the bodice together I realized that I had forgotten to make the required changes to the pattern after I had discovered a couple of small faults in it already while making the last 1630s dress. So no new underdress for the upcoming ball, only for the one in spring where I'm planning to wear the same dress only with different decoration. So many balls this season, the comtesse's seamstress is a little stressed! :D

Compared to the light-blue 1630s, I shortened the flaps and the stomacher a bit. Next time I'll try one without any flaps at all and a laced front closing, like in this picture. But this will involve some more research, so the grey one just has my trusty hook-and-eye closing over a stomach piece. Plus a couple of ribbons for later, maybe, whatever I'll find in my boxes. As it was actually meant as a day dress, not as a ball gown, there's not much decoration. The motto of the ball was "cabinet of wonder" and we were asked to have some interesting decoration, so I took some inspiration from the palaces I visited this summer. Due to time's fast pace (damn, I'll never get used to that!) I threw all plans overboard to make some shell decoration in mute colour for the first (small) ball and some bright red-coral decoration for the next, bigger one. (And there's people who say I wear my dresses just once, tsktsktsk... ;) ) Anyhow, I was unable to find my collection of shells so I decided to do some pearl decoration. The irregularly shaped ones for the tiara were surprisingly expensive so I switched to faux corals already for the small ball (which was good because I realized I'm already tied up for the grand one anyway) and had a splendid micture of red and white corals with shell jewelry borrowed from my flatmate. Sometimes it's great not to live alone, against my usual disposition :D


Despite me looking surprisingly great that evening the camera didn't like me and the pics turned out horrid, so I'll add decent pictures later that I don't have to be ashamed of...


Sunday, 5 July 2015

On starching fabric

I never knew it would be that practical! But after trying every theatre-trick from heavy fabric and wired seams to iron-on interfacing to get nicely shaped collars and all, I decided to use old-fashioned starch. My only experience so far has been with potato-starch, but it worked nicely and I didn't discover any disadvantages so I guess I'll stick with it. The starch-water-ratio may vary, depending on the size of your spoons and the thickness of the starch you want to produce, but all in all it has proven best to make some heavy starch basis that can be diluted to get the desired mixture.

1 litre of water
4 teaspoons (!) of starch (NOT tablespoons; you'll end up with a bowl of goo)

Mix the starch with some cold water. You'll get a whiteish puree. Pour in the cooking water and stir well to avoid the forming of lumps which you won't want to sit on your fabric. The white starch will turn into a rather clear liquid. If it's still too gooey you can add water until you've reached the desired consistency. If there are too many lumps in it you can put it through a fine sieve before putting in the clothes.

Put the damp fabric into the starch for a moment, squeeze the excess water out gently (you don't want to end up with wrinkles in your collar) and lay the piece flat, allowing excess water to drip off. Dry it quickly, either in the sun or on the heating, and when it's only damp, iron it into the desired shape.

PS: It even worked very well to get the crispness back into tulle that I had had to wash, as well as into dupion silk that had turned a little limp after washing. And if you use too much starch, you'll be able to design an origami dress... ;)

Tuesday, 9 June 2015

Baroque rosary

You start doing weird things once you decide to really equip your character with all things necessary for that time! In my case I used the newly acquired skills in jewelry-making to produce a rosary made of red crystal beads and golden filigree beads. I happened to buy a couple of cross-featuring jewellery when wearing crosses for no particular reason was en vogue, so I have a decent stock for making pompous baroque stuff. Most of the time required went into bending the wires that carry the beads. Joining them together went so quickly that I decided to make another one from the pre-wired filigree beads and large pearls. Always good to have things to lend out at a roleplay. I really have to switch to making necklaces now, or I'll end up with half a tonne of mere decoration with all the material I bought last week!


Material was bought at various stores and bead shops whenever I found something nice, additional elements (like wire, hooks, tools, more beads) are also available online in case you don't have any craft stores around.


Thursday, 15 January 2015

Light-blue 1630s gown

Inspired by the costumes from the series "By the Sword Divided" (and by the fact that actually I should finish the ballgown, but another new dress for the meeting before the ball would be just too nice...) I was highly motivated to make some more 1630s-style dresses. I ended up with six new fabrics and decided to use one that had been sitting at the back of my wardrobe for the past dunnohowmany years. The lovely light-blue jacquard (cotton-rayon-mix, for a change) told me it wanted to become my next gown. Now. Before the ballgown. I did lots of research to get an authentic pattern and to discover how on earth the skirt was attached to the high-waisted bodice without adding too much bulk, for clearly those dresses weren't two-pieced. The internet knows everything, but it doesn't know this. And the books may know it but I found none that would tell me. In the end I decided to use my fitted semi-authentic pattern and toy with the skirt until it worked. And it worked. Rather quickly. So now I hope also the six new fabrics will soon be made into more gowns for my vain countess! ;)

The chemise this time is made the original way, with separate starched collar and cuffs to pin or sew on before wearing and take off again before washing. The lace was bought approximately at the same time as the fabric and takes up the palmette-pattern. And this time the shape of the collar is not cut but made by sewing tucks into a long rectangle that give it a round shape to follow the neckline.

The bodice follows exactly the pattern I used for my dark-blue baroque dress, except I shortened the tabs. As I was planning to sew the skirt to the bodice I wouldn't need the long tabs to hide the white chemise underneath. The skirt is sewn right into the seam above the tabs, and the closure corresponds nicely with the little slit in the skirt's side seam. A satin ribbon decorates the high waist, the bowtie hides hook and eye. Great thing to have a box full of ribbons in all colours of the rainbow (and some more) to choose the matching colour from! ^^

The sleeves were the part I wanted to improve this time. The sleeves of my previous two early-baroque gowns were still not full enough, to my linking, so I added more volume and, as I have already two dresses with closed sleeves, slit these at the front. Also a very popular variation in those days. The edges are embroidered with little pearls, satin bow-ties decorate the upper end of the slit. Avoid flimsy art-silk lining. But the colour matched so nicely, and I liked the shimmer...

The skirt of this dress is not just a long rectangle sewn into a tube and then gathered, but has its seams cut a little on the bias so the waist is narrower than the seam - and hence less fabric has to be pleated into the waistline, which otherwise might make it look plump. Also there's no slit at the back, but a slit in the side-seam so skirt and bodice both close at the front.

And the very best thing: this gown can be put on in no time! Perfect for someone who wants to change three times a day at a roleplay :D

In this two pictures there's no matching chemise yet, I was in a hurry finishing the dress itself.


Wednesday, 29 October 2014

French Royal Banners

I admit a slight obsession with fleur-de-lys ever since... - well, let me just assure you there's a very good reason behind each and every of my whims ;) Hence I decided we need some decoration for our liveroleplays and I will stitch a banner.

The idea:


The fleur-de-lys are sized A4, so the whole thing is pretty big. And as I couldn't decide whether to make a banner with six A4-sized or with three A3-sized lilies, I went for both. Why decide if you can have it all ;)

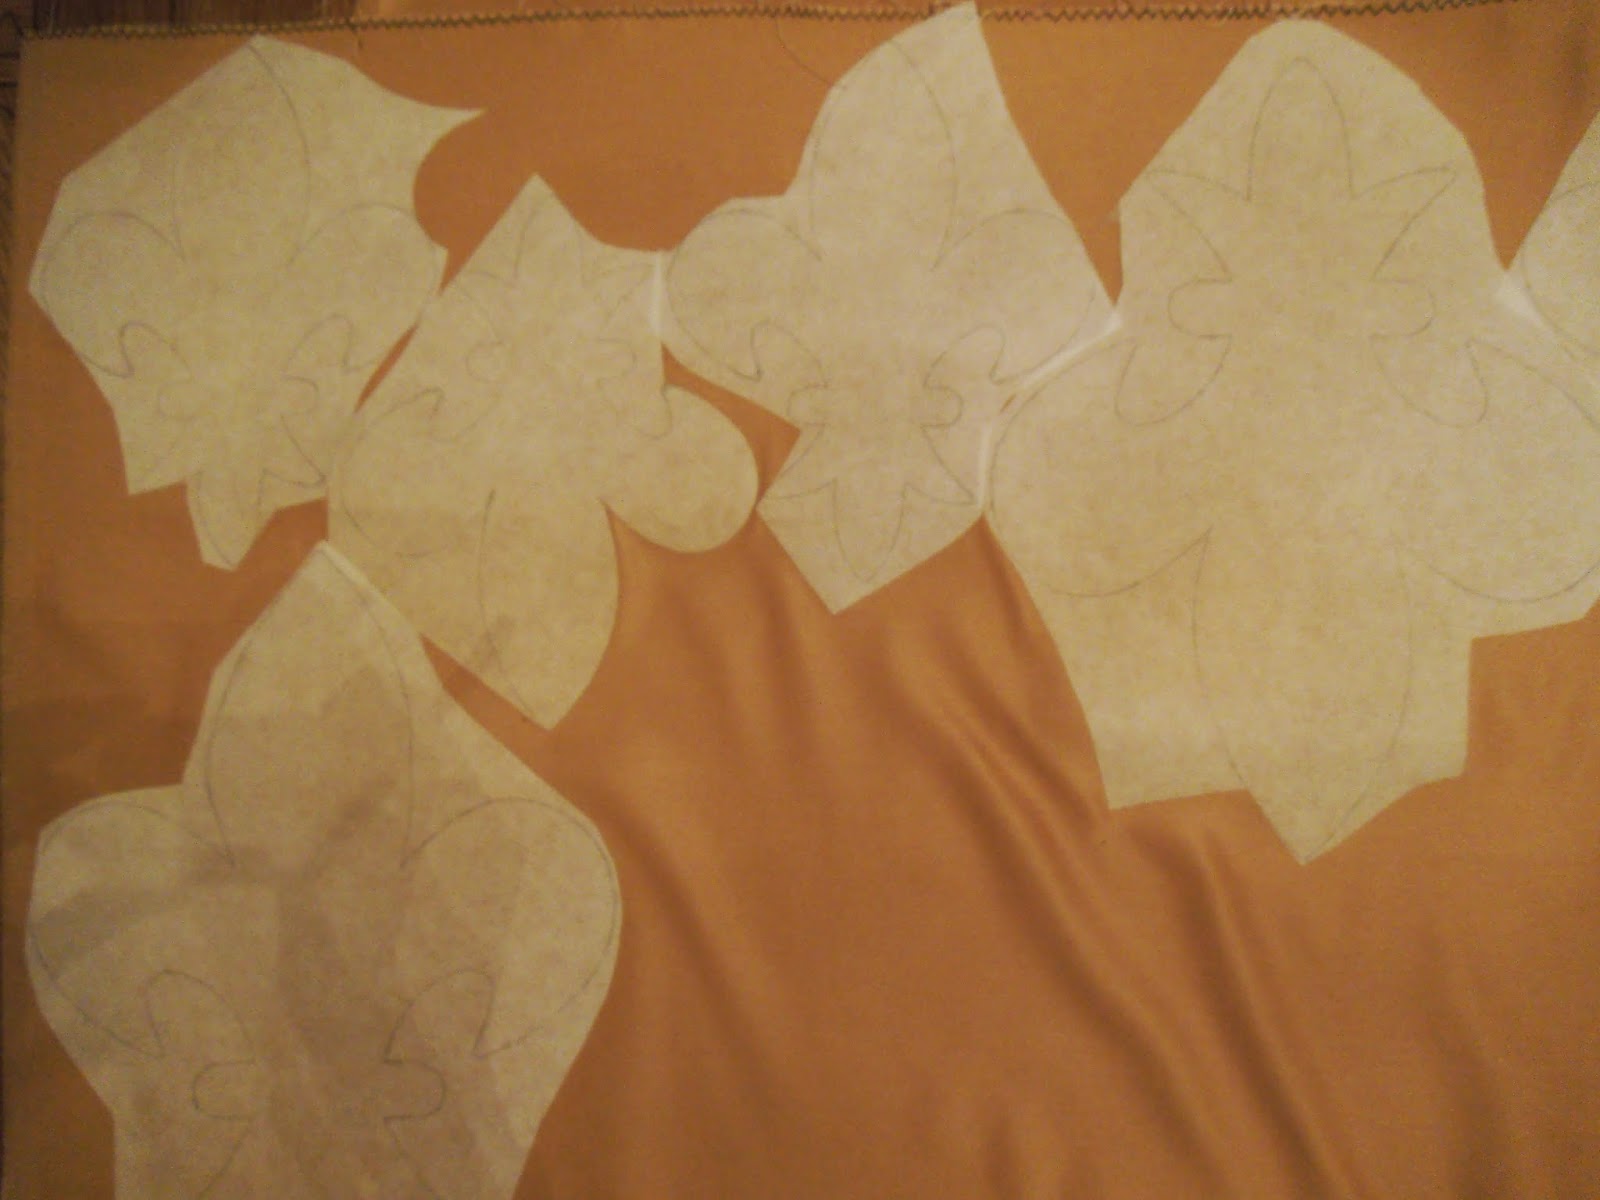
Miraculously I found some crincle-free blue fabric, yellow for the reverse and even golden satin for the fleur-de-lys with ease. And matching trim. And perfectly matching thread! Fate clearly favours the mad... I happened to find a roll of iron-on interfacing in my store (that I had bought previously for the sole reason that it was cheap and one might need 10+ metres of interfacing some day) to enforce the satin and make smooth, shiny lilies. Here they are, drawn, ironed-on and ready for cutting.


And to motivate myself for the tedious and meticulous (and thus swear-worthy) job of pinning them in place exactly and zig-zagging them onto the banner, I did a trial-version of each:


The banner itself is lined with plain, heavy fabric to enforce it, then the fleur-de-lys are sewn on.

And then comes the really tedious part...  As a plain edge would be boring, I bought golden cord to frame the whole thing. Let's just say it took a lot of effort and other things to pin and sew it straight.

Wednesday, 3 September 2014

Quick'n'easy musketeer hat

You need:

- a broad-brimmed fedora - the kind you usually get in any fashion store in autumn
- 1 - 1.2 mm wire, as long as the outer circumfence of the brim
- same lenght of woven trim or ribbon or bias tape in a matching colour
- matching thread

1) Put the edge of the brim into the sewing machine and let the wire run right alongside while you zig-zag around. Overlap the wire ends a little so you get a smooth connection.

2) Cover the whole edge with trim/ribbon, putting it around the wired edge in U-shape. Again, overlap the edges a little and finish the visible end neatly by hand.

3) Add a hatband in a matching colour.

4) Take two or three ostrich plumes and sew them to the hatband on the side of the hat that will afterwards be tucked up.

5) Put one side of the brim up and either pin it to the crown with a small, decorative pin, or sew it up with a cross-stitch in matching thread. Finito! :)

Wednesday, 20 August 2014

New pair of hanging pockets

If another baroque reenactment is coming up and you have nothing but non-period stuff to hand-sew, what do you do? Of course, you create another absolutely unnecessary project for yourself - like embroidering yet another pair of pockets that noone but your most intimate friends will ever see! ;) Same cut and procedure as last time, only this time not striped and in blues but white with colours. Let's see where my creativity leads me! Pics to come...

Monday, 27 January 2014

Baroque gown of midnight-blue silk with embroidery

Yes, seems I'm going completely round the bend now, but take two nutters of the same kind and you'll end up with a baroque couple in matching, hand-embroidered costumes. So actually this isn't my fault. At least not entirely ;)

My dress is basically the same pattern as the burgundy gown I made two years ago, only this time I worked with dupioni-silk. No point in investing hours of embroidering on artificial fabric. I'm working with cotton thread nonetheless, as this is going to be just some kind of test-version before I go completely nuts and start silk embroidery - the next dress is already in planning... The colour of the fabric is a beautiful, very dark blue in daylight, seeming almost black in artificial light.


The embroidery:

As the name of the character I'm playing is Marguerite, I decided to work a pattern of little flowers all over the bodice and sleeves, the edges decorated with a pattern similar to wooden trellis. I knew it would cost me hours, but thanks to Dr. Who and various other BBC productions that infiltrate your brain with valuable information on things you never knew were that interesting, quickly made good progress.


I started with working the trellis-pattern along all the future edges of the bodice and the sleeves in dense herringbone stitch and stem stitch as an outline. Marking the flowers was almost as much work as embroidering them. I fear I'm just too much of a perfectionist... The marking was done in white pencil, as it stays on longer than chalk but still rubs off after some time. The draft was done with five petals, in reality it turned out it looked half-hearted, so there we are with eight spokes on the little marked-out wheels that are to become the marguerites. Each flower is about 1.2 cm in diameter.


The next stage after the marguerites was the leaf border to connect them. I really came to hate those tiny, fiddly leaves that forgive not even the tiniest mistake. But after like a hundred leaves or so you get the knack. Only by then, you're almost through with them anyway! The stems are stem stitch, the leaves satin stitch, and the dots french knots added to create the arcade effect.


And then I could go really crazy and do the little bouquets... Here's a close-up of one, with a french knot in the centre and fly stitches as decoration. They only have six petals, otherwise you couldn't interlace them. And as the flowers were slightly larger than in the sketch, I worked only four of them instead of five and left the stems aside. That made for a literally more well-rounded picture.


With the edges of the bodice nicely framed, I was left with the design of the front, which should be a little more elaborate. I decided to but the bouquets on stems which give the stomacher a nice horizontal balance.


Still there was some space left in the top corners of the front closure. I toyed with some more flowers, but it looked plain. Too many flowers already. I needed something extravagant. And as the dress was designed as my character's engagement gown, I worked the initials of me and my fiancé into the corners. They look as if they had always belonged there right from the first sketch ;)


The sewing:

Basically this dress is the same pattern as my burgundy gown. Only as I did that one in great hurry back then and had no time or nerves for taking pictures, I will post some here.

The bodice consists of four layers: two between which the boning is sandwiched, one top layer (in this case, the embroidered silk), and one lining. All parts are thus cut out and put together so you end up with four bodice shapes, more or less identical in size. I always try to make the outer layers a tad bit larger (we're ralking here only of millimetres), but that's just my perfectionism. I used black cotton twill to carry the boning and light black cotton for the lining.

The inside of the bodice was exactly the same tedious kind of work as my burgundy gown a couple of years ago. You cut all parts twice from sturdy fabric that won't be seen in the final product but will carry all the boning. I used plastic boning that I zig-zagged right onto the fabric of one of the inside layers, this is covered by the second inside layers so no boning is seen anymore, and no plastic edges can dig into your hips. As this second layer will cover the boning completely, you don't have to worry about visible seams, only about the exact position of the boning. I took pictures of the outside and inside. As the boning I used comes by metre in a large roll, it's still bent. In this case, use it the way you will be squeezing it towards your body when the bodice is worn, so it will make a nice shape and gradually adjust to your shape.


I had already forgotten just how much effort it takes to squeeze a fully boned bodice through your sewing machine again and again until all the boning is done...

The sleeves are cut out twice, once from silk and once from cotton for the lining, sewn together on their left sides right beside the embroidery, and turned over to form a neat edge that is now hand-pleated evenly and secured with invisible stitches.

You will want to sew on the hooks and eyes before the embroidered silk layer to avoid visible machine stitches at the front. And once the top fabric has then been hand-stitched onto the boned bodice, you have to maneuvre the whole, stiff thing through the machine again to attach the sleeves and the skirt. I swore. A lot. Because, of course, as always, time was already pressing, and the hours until the ball melted away, and still there was the packing and shopping to do... Which, in the end, thankfully was done for me this time, with the result that indeed we managed to get to the ball in time. What a new experience! :D