A friend recently gave me a regency dress she wasn't happy with. The reason was quickly discovered and is one of the most common difficulties when sewing for this period: the front skirt part didn't fit at all. The tricky part is to keep it as flat as possible while still putting enough fabric to the front to keep it from clinging to your belly but not making you look pregnant - which requires shaping the top edge a bit.
So first step: undo the front half of the waist seam and the side seams, as well as the hem which will also have to be adjusted. The upper edge of the front skirt piece is cut out in a slight curve, the sides are cut slightly at an angle. This helps to keep the front flat because this slightly trapezoide shape gives more fabric at the hem where it's needed while keeping the upper part as smooth as possible without adding bulk. Two small tucks (one under each breast) also help. I also had to take a little width out of the bodice, taking in the side seams beneath the sleeves, then closed the side seams again. Always check if the pleated back part of the skirt doesn't come too far to the front, which would ruin the silhouette. Which it didn't do here, so I could adjust the hem and finish a very practical day dress. It can be worn without any kind of undergarments (like corset or even bust-shaping shift) thus being the perfect choice for summer reenactments. Yay again to me being a stick figure :D
Monday, 9 December 2019

Thursday, 30 May 2019
Green regency hat
If you happen to find a woven golf visor straw hat, buy ten of them, they make lovely regency hats! I found one with a hatband matching my dress which I hastily decorated for a first outing, then took apart, shaped properly and decorated anew.

The crown is rather flat, as it's designed to be worn as sun protection and flat on your head. I beribboned it and during the first trip discovered a few flaws due to this shape.

It doesn't sit on your head tight enough, and tends to slip up or down depending on where on the back of your head your hairdo is. Plus it just looks like a golf visor hat repurposed. So once back, I set myself to do the thing properly. Which meant stripping it of five hours' worth of hand-stitched-on trimming, moistening the crown (spray with water, inside and outside) and putting it into a flower pot for shaping :D You take what you can get... Make sure to remove all ribbons, sweatbands etc., you want just the plain straw weave.

Let dry over night and you'll get a nice, cone-shaped crown, still flexible enough to fit to your head. The bottom of the crown can remain round or you can flatten it once the actual size has been determined.

Put this on as you would the finished hat, if possible with updone hair so you discover where it sits perfectly. Sew a plain cotton ribbon around right where the brim starts to retain this size. If you like, you can flatten the back of the crown by moistening it again and pressing it flat. I just put it on the floor and put a bottle into the crown. Simple as that.
In the meantime, buy a properly shaped hat at a reenactment because you lose your patience and need sun protection...
I sewed the previous green hatband back on (invisible stitches), as well as the satin ribbons. All that's missing now are the proper pictures ;)

The crown is rather flat, as it's designed to be worn as sun protection and flat on your head. I beribboned it and during the first trip discovered a few flaws due to this shape.


Let dry over night and you'll get a nice, cone-shaped crown, still flexible enough to fit to your head. The bottom of the crown can remain round or you can flatten it once the actual size has been determined.

Put this on as you would the finished hat, if possible with updone hair so you discover where it sits perfectly. Sew a plain cotton ribbon around right where the brim starts to retain this size. If you like, you can flatten the back of the crown by moistening it again and pressing it flat. I just put it on the floor and put a bottle into the crown. Simple as that.
In the meantime, buy a properly shaped hat at a reenactment because you lose your patience and need sun protection...
I sewed the previous green hatband back on (invisible stitches), as well as the satin ribbons. All that's missing now are the proper pictures ;)
Tuesday, 12 February 2019
Scottish robe à l'Anglaise
I had been toying with the idea of making a dress from this crazy tartan design just for the sake of having an absurd dress. In the end it came out not so absurd at all!
 |
| Fabric for: Regency dress, Anglaise and Francaise |
Scottish robe à la Francaise
Another liveroleplay upcoming, Jacobite Scotland this time! Time for yet another Francaise after my tried pattern. Only if you use it for a Francaise instead of a Piemontaise (as I did last time), bear in mind that you'll have to cut the part for the Watteau pleats at an angle, or you'll end up with not very nice pleats that make a perfectionist undo the complete back part to set in gores to get proper pleats. The fabric is a light cotton tartan weave, and six metres were just enough for the robe and the decoration. If you want to have the skirt underneath made from the same fabric, buy at least 8 metres or more for skirt decoration.
The sleeves have two flounces, and two rows of lace underneath. Again, used the usual pinking shears method. Getting a pro in this...

The bodice is fitted with no back lacing as the earlier Francaises would have. The top fabric is sewn to the lining right along the watteau pleats.Make sure you cut the Watteau part at an angle or the pleats won't fall nicely.

And here came the moment when I realized I'd have to make a quick pannier-bumroll because the one I wore for the Piemontaise doesn't work with the pleating of a Francaise... Why do I keep encountering unexpected problems no matter how many years of experience I have?
 |
| Fabric raid: Regency dress, Anglaise and Francaise |
The sleeves have two flounces, and two rows of lace underneath. Again, used the usual pinking shears method. Getting a pro in this...

The bodice is fitted with no back lacing as the earlier Francaises would have. The top fabric is sewn to the lining right along the watteau pleats.Make sure you cut the Watteau part at an angle or the pleats won't fall nicely.

And here came the moment when I realized I'd have to make a quick pannier-bumroll because the one I wore for the Piemontaise doesn't work with the pleating of a Francaise... Why do I keep encountering unexpected problems no matter how many years of experience I have?
Wednesday, 24 October 2018
Robe à la Piemontaise
The tailor's dilemma: What does this fabric want to become?

I made a victorian summer daydress for a friend early this year and bought all they had of this striped fabric with the intention of a) getting a better price, and b) making another dress for myself. The striped cotton would look lovely as a Francaise, the pleats would drape nicely, but on the other hand I'd love to drape the skirt into a polonaise style which to me looks weird with paniers and Watteau pleats and thus requires an Anglaise.
The answer to the dilemma: a robe à la Piemontaise, which combines the advantages of a Francaise (the Watteau pleats) with those of an Anglaise (can be draped into a faux Polonaise). Plus I've seen period pictures of draped Piemontaises but not a single draped Francaise.
There are excellent tutorials on Koshka's website, as well as on Isis' website. My version is to be worn over paniers with a violet underskirt, or draped Polonaise-style with a different underskirt over a bumroll. Two different skirts because for paniers, the sides of the skirt have to be longer to make for an even hemline when worn. If you loop up the gown it doesn't matter if it's actually cut to fit over paniers.
And I still have enough fabric left to make a victorian bustle gown...
----------
The cut of the slightly boned bodice follows a Francaise pattern from Norah Waugh's "The Cut of Women's Clothes", as does the petal-shape edge of the engageants. I cut them with the same pinking-edge-scissor-trick I used for the flounce of my striped skirt, deto the ruffle that decorates the front edge of the robe. The lace beneath the engageants is machine-embroidered cotton lace, matching the colour chart for this dress. It's good quality, so the embroidery doesn't look machine-made on first and second sight.
The stomacher consists of one layer of buckram with five lengths of boning sewn on, then covered with top fabric and lining which is closed at the top back. It's the same fabric as the Francaise petticoat and imitates the ribbon closing very common in pictures of Mme de Pompadour but is completely detachable, the ribbons look as if they were closing the robe but are merely decoration.
The ribbons were sewn to the edge, then tied into bows and fixated to the stomacher with a few invisible stitches as they're not meant to open. The edge trimming consists of two rows of pre-pleated ribbon zig-zagged together, two rows of lace sewn on top and a length of slender ribbon, slightly curled, stitched on top to cover up any machine seams. I also made some silk flies in violet and cream that I have to put somewhere...
The complete front edge of the robe is decorated with a self-fabric ruffle (take care to cut striped fabric across so you get horizontal stripes) and the same decoration in its centre as on the stomacher - pleated ribbon, lace, curled satin ribbon.
The petticoat for wearing the robe Francaise-style is decorated with a ruffled strip of self-fabric along the hemline and a length of pleated ribbon (I thought I had bought ten metres but it seems it was one of those occasions when I say "oh, you know, I'll take the whole package".)
Assembling the back part of a Piemontaise is a bit tricky. Attach both side parts of the skirt to the bodice. Then attach to the skirt the centre back part that's to be pleated. Mark where it meets the lowest edge of the bodice and sew the part above this into a tube. At the lower end of it make a T-cut that goes edge to edge with the bodice, the rest above is pleated and sewn to the neckline. Those pleats should fall freely but not slacken around where skirt and bodice meet. All I can say is that I love my tailor's dummy!

A not very good shot of the beta-version I wore to the last rococo ball, taking pictures inside was forbidden unless you were the official photographer. Actually this dress wouldn't be a ballgown but rather a nice summer dress - but considering that figuring out the pattern took ten times longer than planned and thus time was short (again) it was good enough.

I made a victorian summer daydress for a friend early this year and bought all they had of this striped fabric with the intention of a) getting a better price, and b) making another dress for myself. The striped cotton would look lovely as a Francaise, the pleats would drape nicely, but on the other hand I'd love to drape the skirt into a polonaise style which to me looks weird with paniers and Watteau pleats and thus requires an Anglaise.
The answer to the dilemma: a robe à la Piemontaise, which combines the advantages of a Francaise (the Watteau pleats) with those of an Anglaise (can be draped into a faux Polonaise). Plus I've seen period pictures of draped Piemontaises but not a single draped Francaise.
There are excellent tutorials on Koshka's website, as well as on Isis' website. My version is to be worn over paniers with a violet underskirt, or draped Polonaise-style with a different underskirt over a bumroll. Two different skirts because for paniers, the sides of the skirt have to be longer to make for an even hemline when worn. If you loop up the gown it doesn't matter if it's actually cut to fit over paniers.
And I still have enough fabric left to make a victorian bustle gown...
----------
The cut of the slightly boned bodice follows a Francaise pattern from Norah Waugh's "The Cut of Women's Clothes", as does the petal-shape edge of the engageants. I cut them with the same pinking-edge-scissor-trick I used for the flounce of my striped skirt, deto the ruffle that decorates the front edge of the robe. The lace beneath the engageants is machine-embroidered cotton lace, matching the colour chart for this dress. It's good quality, so the embroidery doesn't look machine-made on first and second sight.
The stomacher consists of one layer of buckram with five lengths of boning sewn on, then covered with top fabric and lining which is closed at the top back. It's the same fabric as the Francaise petticoat and imitates the ribbon closing very common in pictures of Mme de Pompadour but is completely detachable, the ribbons look as if they were closing the robe but are merely decoration.
 |
| Unadorned stomacher |
 |
| Decorated version |
 |
| Ribbon with lace on top... |
 |
| ...topped off with satin ribbon |
The ribbons were sewn to the edge, then tied into bows and fixated to the stomacher with a few invisible stitches as they're not meant to open. The edge trimming consists of two rows of pre-pleated ribbon zig-zagged together, two rows of lace sewn on top and a length of slender ribbon, slightly curled, stitched on top to cover up any machine seams. I also made some silk flies in violet and cream that I have to put somewhere...
The complete front edge of the robe is decorated with a self-fabric ruffle (take care to cut striped fabric across so you get horizontal stripes) and the same decoration in its centre as on the stomacher - pleated ribbon, lace, curled satin ribbon.
The petticoat for wearing the robe Francaise-style is decorated with a ruffled strip of self-fabric along the hemline and a length of pleated ribbon (I thought I had bought ten metres but it seems it was one of those occasions when I say "oh, you know, I'll take the whole package".)
Assembling the back part of a Piemontaise is a bit tricky. Attach both side parts of the skirt to the bodice. Then attach to the skirt the centre back part that's to be pleated. Mark where it meets the lowest edge of the bodice and sew the part above this into a tube. At the lower end of it make a T-cut that goes edge to edge with the bodice, the rest above is pleated and sewn to the neckline. Those pleats should fall freely but not slacken around where skirt and bodice meet. All I can say is that I love my tailor's dummy!
A not very good shot of the beta-version I wore to the last rococo ball, taking pictures inside was forbidden unless you were the official photographer. Actually this dress wouldn't be a ballgown but rather a nice summer dress - but considering that figuring out the pattern took ten times longer than planned and thus time was short (again) it was good enough.
Monday, 1 October 2018
Fingerless mittens
I had yarn left that I wanted to use up, and I wanted an upper-class pair of mittens for rococo and regency, so I found myself some nice sock pattern (there's plenty of them!) that I adapted for mittens.
For the edge, I used the Bintje pattern from https://www.ravelry.com/, the pattern of the mittens being DROPS design: model nr. FA-146 from the German knitting page www.garnstudio.com.
The pattern is pretty easy to knit if you have a bit of experience, as it's logic and repetitive. Don't forget the counting, though ;)
For the edge, I used the Bintje pattern from https://www.ravelry.com/, the pattern of the mittens being DROPS design: model nr. FA-146 from the German knitting page www.garnstudio.com.
The pattern is pretty easy to knit if you have a bit of experience, as it's logic and repetitive. Don't forget the counting, though ;)
Monday, 24 September 2018
Jacket and skirt
The fabric combination might seem familiar, it's bedding from Ikea. The striped fabric was the blanket cover, it's going to be an ankle-length skirt with ruching. The Indian-import-style flower cotton were the pillowcases, and having a very limited amount of fabric here, I decided for a short caraco jacket, decorated with - Guess! - fly fringe, as I just discovered how addictive it is to make it. See the post on fly fringe trim for any tips and how-to's.

As to the skirt support, here's a very helpful site to discern what shape was fashionable in what decade and how to achieve it: http://demodecouture.com/late-18th-century-skirt-supports/
The 18th century wasn't all Robe à la Francaise and paniers, during the 1770s there was also a fashion featuring shorter skirts and rounded hips, which I used as a model for this dress.
I have no pinking irons yet to make round pinked edges, and neither was I able to find craft scissors which give the desired edge and are strong enough to cut fabric, so I used the zigzag ones instead and cut a tiny bit off the points with a normal pair of scissors. They appear rounded now, and no one's going that close to my skirt seams anyway.
Pinking irons have the advantage that they press the fibres and the edge is slightly less prone to fraying, but I'll just give it a try.
The ruches measure a bit more than twice the hem circumfence.

The jacket was actually intended to be a caraco until I figured that I don't have enough of the fabric and went for a shorter jacket pattern.

As to the skirt support, here's a very helpful site to discern what shape was fashionable in what decade and how to achieve it: http://demodecouture.com/late-18th-century-skirt-supports/
The 18th century wasn't all Robe à la Francaise and paniers, during the 1770s there was also a fashion featuring shorter skirts and rounded hips, which I used as a model for this dress.
I have no pinking irons yet to make round pinked edges, and neither was I able to find craft scissors which give the desired edge and are strong enough to cut fabric, so I used the zigzag ones instead and cut a tiny bit off the points with a normal pair of scissors. They appear rounded now, and no one's going that close to my skirt seams anyway.
 |
| pointed zigzag versus almost-rounded zigzag |
Pinking irons have the advantage that they press the fibres and the edge is slightly less prone to fraying, but I'll just give it a try.
The ruches measure a bit more than twice the hem circumfence.

The jacket was actually intended to be a caraco until I figured that I don't have enough of the fabric and went for a shorter jacket pattern.
Polonaise jacket and skirt
Ikea has always been a great source for fabric with period rococo patterns! I found this former bedlinen used on Ebay, the striped part for the skirt, the flowery part for the bodice. It was a single bedding, so the amount of fabric is absolutely limited. The striped fabric really is just enough for an ankle-length skirt, the equal amount of flowered cotton is enough for a casaquin, casually called a pet-en-l'air, or for a polonaise. The cotton is rather coarse, so it won't do as an upper-class outfit but I found matching silk floss so it will get fly fringe trimming nonetheless ;)

The fabric had been sitting in my storage for quite some time until recently I found that "right now" is the time for a new costume for a one-shot character I was playing three days hence. Because why not.
The skirt is the usual, simple rococo skirt shape, a little longer at the back so it can be worn with a padded rump.
The jacket was actually intended to be a casaquin but upon closer inspection the fabric wanted to become a polonaise. I used Janet Arnold's caraco pattern from 1775/85 but changed the front.

I had found matching embroidery floss and also had the intention of making some fly trim decoration, plus I wanted to close the jacket with ribbons, and for all this I'd need a stomacher; a very broad one - J P Ryan's stomacher from the jacket package is perfect. The jacket pattern gave me quite some trouble when I discovered that despite enlarging it to my size without much ado the front part of the peplum makes horizontal creases at the waist that definitely don't belong there. The peplum demands to be taken up at the sides and the back, then the creases vanish and the ensemble looks lovely. The problem can be remedied by taking in a small tuck along the waistline to shape it (not done in the original), in which case the caraco can also be worn with the peplum down.
The neckline is quite large at the front, and required a stomacher with a rounded top. It's put in with hooks and eyes and the ribbons closed on top.
The hat is actually the first thing now that has been finished (I might want to add fly trim to the ruching once I've produced enough, but for now I call it finished!) completely and looks so lovely I took up re-working the caraco (which is just the tiniest bit too tight to feel perfect) and finally adding a decent waistband to the skirt. The hat consists of an Ikea straw placemat, the crown shaped with water and ordinary household jars. Decoration became more and more as I was working along, and at one point I stripped the hat of its original ruching to switch to a lighter tone to match the dress pattern more perfectly. I'm finally able to de-stock my plethora of artificial flowers - the ones on the hat are even silk (the blue ones) - and artificial birdies :D The lace around the brim is the only thing that's glued on invisibly, everything else, ruffles, hatband, flowers, was sewn on with invisible stitches.


The fabric had been sitting in my storage for quite some time until recently I found that "right now" is the time for a new costume for a one-shot character I was playing three days hence. Because why not.
The skirt is the usual, simple rococo skirt shape, a little longer at the back so it can be worn with a padded rump.
The jacket was actually intended to be a casaquin but upon closer inspection the fabric wanted to become a polonaise. I used Janet Arnold's caraco pattern from 1775/85 but changed the front.

I had found matching embroidery floss and also had the intention of making some fly trim decoration, plus I wanted to close the jacket with ribbons, and for all this I'd need a stomacher; a very broad one - J P Ryan's stomacher from the jacket package is perfect. The jacket pattern gave me quite some trouble when I discovered that despite enlarging it to my size without much ado the front part of the peplum makes horizontal creases at the waist that definitely don't belong there. The peplum demands to be taken up at the sides and the back, then the creases vanish and the ensemble looks lovely. The problem can be remedied by taking in a small tuck along the waistline to shape it (not done in the original), in which case the caraco can also be worn with the peplum down.
The neckline is quite large at the front, and required a stomacher with a rounded top. It's put in with hooks and eyes and the ribbons closed on top.
The hat is actually the first thing now that has been finished (I might want to add fly trim to the ruching once I've produced enough, but for now I call it finished!) completely and looks so lovely I took up re-working the caraco (which is just the tiniest bit too tight to feel perfect) and finally adding a decent waistband to the skirt. The hat consists of an Ikea straw placemat, the crown shaped with water and ordinary household jars. Decoration became more and more as I was working along, and at one point I stripped the hat of its original ruching to switch to a lighter tone to match the dress pattern more perfectly. I'm finally able to de-stock my plethora of artificial flowers - the ones on the hat are even silk (the blue ones) - and artificial birdies :D The lace around the brim is the only thing that's glued on invisibly, everything else, ruffles, hatband, flowers, was sewn on with invisible stitches.


Fly fringe trim
Fly fringe, the legendary unicorn among historic trimming and the
most 18th-century-ish decoration you can put onto your dress. As you
can't buy it, you usually have to make it yourself. The downside is that
it really takes time, as you have to prepare every single fly and then
string them into a trim. The upside is that you can make this kind of
trimming according to the colour chart of your dress.
After tracking down some how-to's, I decided to jump into it myself and make some fly fringe for my upcoming rococo projects. I still had silk embroidery thread in various colours whicht I ought to use up eventually because having umpteen colours but just 10 metres each isn't very helpful for embroidery, so better use them for trimming. I figured that measuring 15 centimetres amounts to five tiny silk floss flies with one knot, using six threads of silk. I also experimented with six strand cotton embroidery floss, twenty centimetres for four flies, double-knot, using four full threads.
As the silk thread is well-twined, being meant for sewing and embroidering, it gives this wavy texture, and I have to unpick the threads with a pin before fluffing them up with a hard nailbrush. You can fluff the cotton version to the same fine texture as silk, but it takes much more time to unpick the threads before fluffing, as cotton fibres adhere much more to each other than the smooth silk fibres.
The
single-knot flies are for weaving them into a braid, the two-knot flies
are to be knotted onto another string of cotton thread.
For making flies if you only have one limited spool of thread and thus can't make and endless string of flies, here's my step-by-step for five flies in a row, using 15 centimetres of silk, allowing thus for 3 cm for each fly:
Cut desired length of silk thread as often as you need to get a fluffy fly. Knot the ends to mark the centre of the first two flies, then place a knot at the exact centre, and between those, two more knots. Cut in half exactly between two knots. Split the threads with a pin, then fluff with a hard nailbrush (or something the like).
After tracking down some how-to's, I decided to jump into it myself and make some fly fringe for my upcoming rococo projects. I still had silk embroidery thread in various colours whicht I ought to use up eventually because having umpteen colours but just 10 metres each isn't very helpful for embroidery, so better use them for trimming. I figured that measuring 15 centimetres amounts to five tiny silk floss flies with one knot, using six threads of silk. I also experimented with six strand cotton embroidery floss, twenty centimetres for four flies, double-knot, using four full threads.
As the silk thread is well-twined, being meant for sewing and embroidering, it gives this wavy texture, and I have to unpick the threads with a pin before fluffing them up with a hard nailbrush. You can fluff the cotton version to the same fine texture as silk, but it takes much more time to unpick the threads before fluffing, as cotton fibres adhere much more to each other than the smooth silk fibres.
 |
| left: double-knot cotton flies; right: single-knot silk flies |
For making flies if you only have one limited spool of thread and thus can't make and endless string of flies, here's my step-by-step for five flies in a row, using 15 centimetres of silk, allowing thus for 3 cm for each fly:
Cut desired length of silk thread as often as you need to get a fluffy fly. Knot the ends to mark the centre of the first two flies, then place a knot at the exact centre, and between those, two more knots. Cut in half exactly between two knots. Split the threads with a pin, then fluff with a hard nailbrush (or something the like).
 | |||
| the stages of a silk fly |
 |
| silk flies, ready for brushing |
Monday, 17 September 2018
Flowery victorian dress
Not my usual style at all :D The dress was planned for a very young
character, hence the girlish look with ruffled hem and flower print.

The skirt consists of three panels with attached ruffle. It can be worn either with the matching blouse or with another of matching colour. There's lace trim at the top of the ruffle, the skirt closes with hook and eye at the back. When attaching a ruffle to a smooth piece of fabric, divide each of it into an equal number of parts, then pin together at the measured intervals and gather the fabric evenly between them. Otherwise with ruching of eight metres or so, you'll inevitably end up with an uneven dispersion of fabric around the hem.

The blouse pattern is a 1970s burda-pattern which fits the style perfectly. I only had to adjust the length of the sleeves a bit and narrow the neckline, as I wanted to have a proper Victorian stand-up collar. And as I had time to finish everything before wearing it for the first time, this blouse even has proper buttons and buttonholes! The visible buttons are shank buttons, the ones that vanish beneath the skirt's waistband are flat ones. I still had mother-of-pearl buttons of both sorts in my stock which fit the cream base colour perfectly. Decoration is also some lace trim along the collar and the yoke, and I even had time for a quickly embroidered initial of the character's name on the button border.


The skirt consists of three panels with attached ruffle. It can be worn either with the matching blouse or with another of matching colour. There's lace trim at the top of the ruffle, the skirt closes with hook and eye at the back. When attaching a ruffle to a smooth piece of fabric, divide each of it into an equal number of parts, then pin together at the measured intervals and gather the fabric evenly between them. Otherwise with ruching of eight metres or so, you'll inevitably end up with an uneven dispersion of fabric around the hem.

The blouse pattern is a 1970s burda-pattern which fits the style perfectly. I only had to adjust the length of the sleeves a bit and narrow the neckline, as I wanted to have a proper Victorian stand-up collar. And as I had time to finish everything before wearing it for the first time, this blouse even has proper buttons and buttonholes! The visible buttons are shank buttons, the ones that vanish beneath the skirt's waistband are flat ones. I still had mother-of-pearl buttons of both sorts in my stock which fit the cream base colour perfectly. Decoration is also some lace trim along the collar and the yoke, and I even had time for a quickly embroidered initial of the character's name on the button border.


Robe à la Francaise of embroidered silk
Yet another upcoming ball, rococo this time, and the only dresses I have for this era are a day dress and a riding habit. I found embroidered silk at a haberdasher's that was not cheap but affordable, and to show off the embroidery I think it has to be another Francaise.


Tuesday, 11 September 2018
Teal regency gown aka "Frankenstein dress"
There's a historic 200-years-Mary-Shelley-Frankenstein-ball and you
need a dress. Being a nerd who loves the novel, you put in as many hints
as possible: the style of the dress is slightly oriental, the
semi-transparent teal fabric is underlaid with a shimmering, silvery
fabric and decorated with silver metal trim, a silver crescent decorates
the headband and the front of the double-sided locket shows a river
scenery with a castle. Avid readers will understand the allusions ;)
The bodice pattern is based on the one from my white ball gown, closing with buttons on the back; only this time I modified the outer layer, which is smooth at the neckline and gathered at the bosom, the pleats opening towards the neckline. I'm sure there's a ready-made pattern for this out there somewhere, but again, I had four evenings (plus a flight and an hour in Regent's Park) to complete the entire dress, from pattern to trimming... The lining is made from the silver rayon I used for the skirt of the shift.
The sleeves are not puffed this time, but slightly gathered at the top and open, ending in a tip decorated with a small silver tassel.
The skirt is attached to the gown beneath a sash of the same fabric, the edges (double sided where they hang down...) trimmed with approximately eight metres of silver braid, tassels at the ends. I did indeed use my usual amount of fabric for the skirt, three fabric widths with the sides of the front panel cut slightly aslant to make for a better fit. If you gather such an amount of fabric at the back of a dress, remember to cut the back neckline a little higher than intended, and the back side of the bodice a little shorter, as good old gravity will unite with the weight of the train and pull the dress a bit to the back when worn. Helps to lift the bosom to a perfect Regency level, by the way ;) And talking of the Regency waist, here's a most helpful guide to the slight changes in shape in each decade: http://www.uvm.edu/~hag/regency/tips/

The shift is a bodiced petticoat after my much-favoured push-up design. The skirt that's visible when dancing is made from a lovely, silver rayon which has a metallic sheen to it that's even visible through the upper layer. The bodice part is made from two layers of cotton for support. The teal dress does have a sash beneath the bust, but it's just decorative, not for actually keeping the dress in place
With this dress I finally found the perfect length for a train which isn't stepped on too often when dancing contredanses and still looks good when waltzing (btw it also is the first ballgown I ever made that was worn twice in two consecutive days, very economic!)
There's also a shawl now to go with this dress, as I found matching wool when at a Frankenstein conference in Ingolstadt - some things come togehter so absurdly nicely you couldn't plan them any better! The pattern is the Aeolian Shawl from knitty.com. There's some slightly glittery but unobtrusive synthetic thread spun into the wool that goes well with the idea of starry sky or electricity, and as also in previous centuries they did use metal threads together with wool for knitting, it's still period enough. The shawl is more like a decorative kerchief, covering the shoulders and the back, but doesn't reach past the sleeves of the dress. I bought more wool than needed with the intention of making matching fingerless mitts...
 |
| Gathering the material. The picture does the silver fabric no credit. |
The bodice pattern is based on the one from my white ball gown, closing with buttons on the back; only this time I modified the outer layer, which is smooth at the neckline and gathered at the bosom, the pleats opening towards the neckline. I'm sure there's a ready-made pattern for this out there somewhere, but again, I had four evenings (plus a flight and an hour in Regent's Park) to complete the entire dress, from pattern to trimming... The lining is made from the silver rayon I used for the skirt of the shift.
The sleeves are not puffed this time, but slightly gathered at the top and open, ending in a tip decorated with a small silver tassel.
The skirt is attached to the gown beneath a sash of the same fabric, the edges (double sided where they hang down...) trimmed with approximately eight metres of silver braid, tassels at the ends. I did indeed use my usual amount of fabric for the skirt, three fabric widths with the sides of the front panel cut slightly aslant to make for a better fit. If you gather such an amount of fabric at the back of a dress, remember to cut the back neckline a little higher than intended, and the back side of the bodice a little shorter, as good old gravity will unite with the weight of the train and pull the dress a bit to the back when worn. Helps to lift the bosom to a perfect Regency level, by the way ;) And talking of the Regency waist, here's a most helpful guide to the slight changes in shape in each decade: http://www.uvm.edu/~hag/regency/tips/

The shift is a bodiced petticoat after my much-favoured push-up design. The skirt that's visible when dancing is made from a lovely, silver rayon which has a metallic sheen to it that's even visible through the upper layer. The bodice part is made from two layers of cotton for support. The teal dress does have a sash beneath the bust, but it's just decorative, not for actually keeping the dress in place
With this dress I finally found the perfect length for a train which isn't stepped on too often when dancing contredanses and still looks good when waltzing (btw it also is the first ballgown I ever made that was worn twice in two consecutive days, very economic!)
There's also a shawl now to go with this dress, as I found matching wool when at a Frankenstein conference in Ingolstadt - some things come togehter so absurdly nicely you couldn't plan them any better! The pattern is the Aeolian Shawl from knitty.com. There's some slightly glittery but unobtrusive synthetic thread spun into the wool that goes well with the idea of starry sky or electricity, and as also in previous centuries they did use metal threads together with wool for knitting, it's still period enough. The shawl is more like a decorative kerchief, covering the shoulders and the back, but doesn't reach past the sleeves of the dress. I bought more wool than needed with the intention of making matching fingerless mitts...
 |
| Wool in daylight, it's actually a shade darker. |
 |
| Finished shawl, it's a bit lighter actually. |
Tuesday, 4 September 2018
How to get vintage leather gloves soft
Only once was I lucky enough to find unused vintage leather gloves, delightfully soft and of perfect cream-white colour. Usually you're not so lucky and have to deal with used second-hand pairs that may be discoloured; and I, for my part, prefer to wash them and disinfect the inside if I buy them at a flea market. Even using a detergent specifically for leather doesn't help much, the leather comes out rather stiff after drying. Here's a collection of insights I gained through experimenting a bit.
- In general, leather gloves should be washed while wearing them and gently washing your hands with the gloves on, using a leather detergent. Rinse thoroughly. Squeeze the water out gently, if possible by rolling them to avoid crinkling. Dry on a towel that you change once it's too wet. NEVER dry on a radiator, it spoils the leather and makes it hard!
- To adjust gloves to your size, either widen them with a finger stretcher or the handle of a wooden spoon while still moist. Best thing is to put them on while still moist.
- While drying, put the gloves on several times and roll them to keep them supple and adjusted to the shape of your hands.
- If, despite all your efforts, the gloves still come out stiff and inflexible (especially funny if they go past your elbows and you can't bend them anymore...), turn them inside out and rub them thoroughly with uncoloured hand lotion or lanolin to replenish the missing grease in the leather. DO NOT use leather care grease, as it's usually yellowish and may discolour your gloves. Some gloves can also be greased gently on the outside, but you'll have to try. NEVER grease suede gloves from the outside!
- If you wear white leather gloves at a ball, don't let sweaty-handed partners touch your gloves without gloves of their own, the sweat discolours the leather (which is basically what must have happened to my extra-long pair).

And this happens if you rub a glove with Via... :D - well, this happens if your gloves come out with the rigidity of cardboard after washing and you have to treat them with hand lotion. Left one thoroughly lotioned from the inside, right one not. They became perfectly supple again, adjusted to my hands and let me bend my elbows. What more do you wish for! Well, they could be a little cleaner, the palms being really greyed (see sweaty-palmed-partner-problem above). I'll figure that out one day...
- In general, leather gloves should be washed while wearing them and gently washing your hands with the gloves on, using a leather detergent. Rinse thoroughly. Squeeze the water out gently, if possible by rolling them to avoid crinkling. Dry on a towel that you change once it's too wet. NEVER dry on a radiator, it spoils the leather and makes it hard!
- To adjust gloves to your size, either widen them with a finger stretcher or the handle of a wooden spoon while still moist. Best thing is to put them on while still moist.
- While drying, put the gloves on several times and roll them to keep them supple and adjusted to the shape of your hands.
- If, despite all your efforts, the gloves still come out stiff and inflexible (especially funny if they go past your elbows and you can't bend them anymore...), turn them inside out and rub them thoroughly with uncoloured hand lotion or lanolin to replenish the missing grease in the leather. DO NOT use leather care grease, as it's usually yellowish and may discolour your gloves. Some gloves can also be greased gently on the outside, but you'll have to try. NEVER grease suede gloves from the outside!
- If you wear white leather gloves at a ball, don't let sweaty-handed partners touch your gloves without gloves of their own, the sweat discolours the leather (which is basically what must have happened to my extra-long pair).
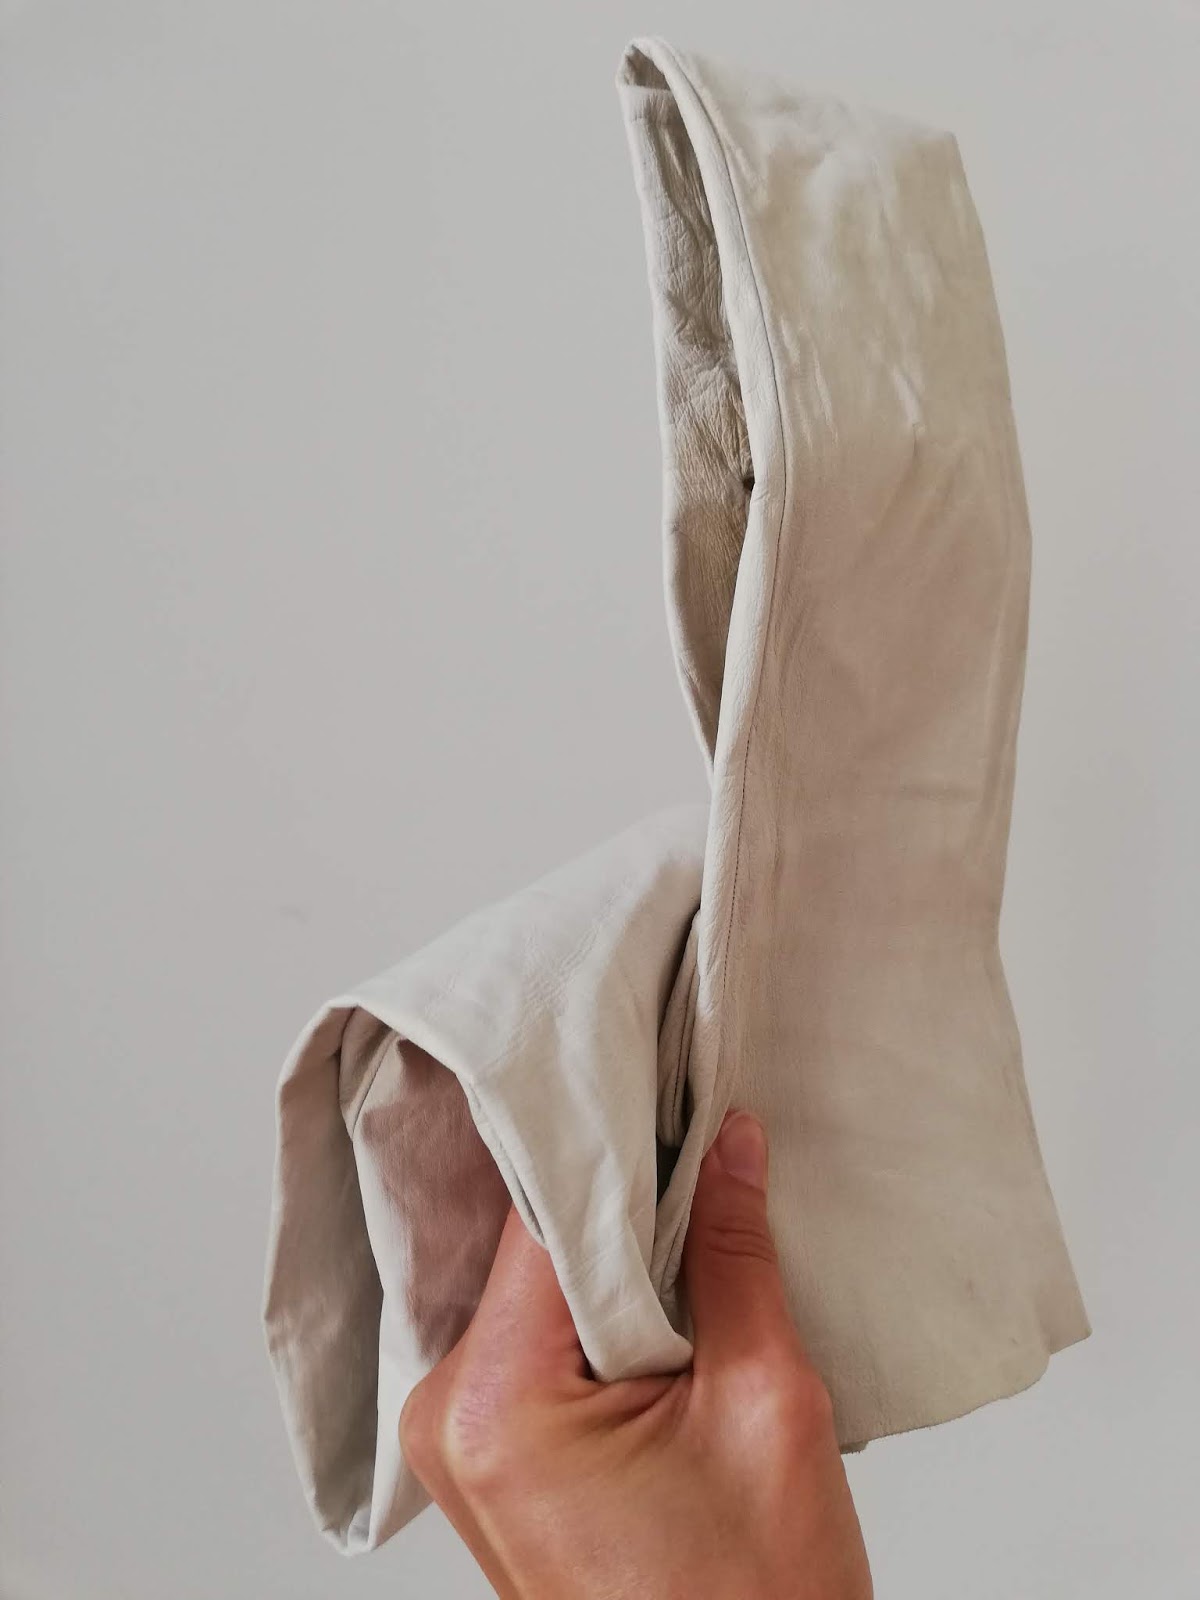
And this happens if you rub a glove with Via... :D - well, this happens if your gloves come out with the rigidity of cardboard after washing and you have to treat them with hand lotion. Left one thoroughly lotioned from the inside, right one not. They became perfectly supple again, adjusted to my hands and let me bend my elbows. What more do you wish for! Well, they could be a little cleaner, the palms being really greyed (see sweaty-palmed-partner-problem above). I'll figure that out one day...
Monday, 3 September 2018
Ridiculously simple elven gown
I had sheer fabric and nice trim that I wanted to use, so I made this really simple elven dress years ago. Basically it's one large piece of fabric sewn into a tube and gathered at the top, edged with trim and straps added. Beneath the bust the fabric is gathered at the front half and covered with sewn-on trim which is just tied at the back where the fabric is left loose. The fabric is see-through, so some kind of undergarment is required, and the seam is overlong and just the unsewn selvedge, all of which makes it perfectly soft and flowing.
 |
| Thanks to Roberto Fusconi for this perfect shot! |
Light green regency dress
Another upcoming event with three days' programme, requiring therefore an adequate number of dresses. For summer. In Italy. Fabric as light as possible. I bought a very nice, sheer cotton/poly-mixture some time ago which was now turned into the intended short-sleeved, non-iron day-dress.
The skirt is a bit less wide than my usual regency dresses, with only a small train but still full enough to billow nicely in a gust of wind or when running.
The bodice follows a pattern I have already tried and lost again in the course of moving twice, so had to design it anew. The fabric being so nice and sheer, it's gathered all around (front a bit more than the back) over a smooth lining (following my push-up-pattern). The neckline is moderate, to be worn with or without a fichù. Simple, richly puffed sleeves, the lining closes with hooks and eyes, the bodice with little buttons at the back.
A cream satin ribbon has now been added as a sash to round things off nicely.
The skirt is a bit less wide than my usual regency dresses, with only a small train but still full enough to billow nicely in a gust of wind or when running.
 |
| Picture by Marcus A. |
The bodice follows a pattern I have already tried and lost again in the course of moving twice, so had to design it anew. The fabric being so nice and sheer, it's gathered all around (front a bit more than the back) over a smooth lining (following my push-up-pattern). The neckline is moderate, to be worn with or without a fichù. Simple, richly puffed sleeves, the lining closes with hooks and eyes, the bodice with little buttons at the back.
 |
| Picture by Roberto Fusconi |
Exercises in invisible mending
Recently came upon a vintage sampler of invisible mending with woven patterns and didn't know how soon I'd have an opportunity for practice :D It was the very first try ever, but for that it came out nice enough.

Short tear in cotton fabric, medium weave shirt.

Make a very small knot at the end of the thread, just enough to keep it secure - if any at all. As there is no strain on the thread, you can just as well leave a tiny end on the left side of the fabric.

And then start re-weaving the pattern minutely. I left the warp of the original fabric and just replaced the torn weft with matching thread. Unfortunately the added blue thread shows rather blatantly, at least to me as a perfectionist. For absolutely invisible mending I guess I'd have to cut all fuzzy threads and replace warp AND weft with threads taken from the fabric to avoid the slight fuzziness my mending produced.
Iron and, if you like some extra security, back with some light fusing tape to seal raw edges at the back.

Short tear in cotton fabric, medium weave shirt.

Make a very small knot at the end of the thread, just enough to keep it secure - if any at all. As there is no strain on the thread, you can just as well leave a tiny end on the left side of the fabric.

And then start re-weaving the pattern minutely. I left the warp of the original fabric and just replaced the torn weft with matching thread. Unfortunately the added blue thread shows rather blatantly, at least to me as a perfectionist. For absolutely invisible mending I guess I'd have to cut all fuzzy threads and replace warp AND weft with threads taken from the fabric to avoid the slight fuzziness my mending produced.
Iron and, if you like some extra security, back with some light fusing tape to seal raw edges at the back.
Thursday, 1 March 2018
Viking apron dress
A setting I haven't played in so far, but that's no hindrance, there had to be a new dress for the upcoming yule gathering! The underdress is dark green linen, the apron dress light green linen. And it was a nice coincidence that a) they did wear shaped dresses with gores, and b) I was really short on fabric, using up scraps, so I could piece together what I had! Another good thing was that for the characteristic decoration at the front I could use those glass beads I had made ages ago, colourful but not really matching. The downside is that, being a perfectionist, I will have to tablet weave matching trim to be proper and authentic. Maybe for the next yule, if I keep playing in this setting.
For the glass bead decoration typical for this kind of dress I used beads I made in my first attempt at making glass beads - they came out quite nice but not good enough yet to be used for jewellery, so this was the perfect project. The end pieces are two large metal buttons that are pinned to the front of the dress.

For the glass bead decoration typical for this kind of dress I used beads I made in my first attempt at making glass beads - they came out quite nice but not good enough yet to be used for jewellery, so this was the perfect project. The end pieces are two large metal buttons that are pinned to the front of the dress.

Black 1660s gown
Death being a big part of life in those days, and my character already being widowed once, chances are high she has one or two mourning dresses in her wardrobe (well, in her case more like ten or so). Again I followed the 1660s pattern but I think I'm tiring of it, and there are enough mid-1600s dresses in my collection now. Off to new horizons! Anyhow, this dress is made of black satin of unknown material, most likely some mixture of natural and artificial fibres. Drapes very nicely. Actually there's a black chemise to be worn beneath it, but I was in such a hurry before the event where the picture was taken that I forgot to pack it, so it looks a bit bare (as far as five metres of fabric can look bare).

And after four attempts with the pattern I've finally figured out the perfect way of sewing in the hooks and eyes :P The trick - at least with my sewing machine - is to take off the presser foot, put the stitch to buttonhole end-stitch and place the presser manually along the halves of the ready-made hook and eye closure where you want the needle to sew. And in the case of this particular dress pattern: work the stiffened interlining, sew upper fabric and lining (NOT the interlining!) together at the front only, place it over the interlining and zig-zag the lining in place along the front, leaving the upper fabric loose.
Pin the hook and eye stuff to the lining + interlining very neatly so the closures are even with the edge. Sew on leaving the upper fabric untouched - you don't want all those stitches showing on your top layer.
Then, only when the closure is sewn onto lining and interlining, you can either sew the neckline of lining and top layer from the back and turn over, or pin it from the right side, fold the upper fabric over the neckline and sew it by hand. I do the latter with the bottom front that goes over the skirt to smooth out all creases.
Ok, maybe I'll have to do yet another 1660s and take pictures of this process, using a fabric that's not black on black...
Proper pictures at last, this time WITH chemise (and himation, as the second ball's motto was "Olymp" and my charakter Eurydike). The himation is just a rectangle of fabric 2 x 1,50, black ribbon sewn two-faced all around the edges, pinned to shoulder and hip, pins hidden under lavishly layered bows (to use up the godforsaken ribbon that I really came to hate while trying to get straight seams with this stuff).


And after four attempts with the pattern I've finally figured out the perfect way of sewing in the hooks and eyes :P The trick - at least with my sewing machine - is to take off the presser foot, put the stitch to buttonhole end-stitch and place the presser manually along the halves of the ready-made hook and eye closure where you want the needle to sew. And in the case of this particular dress pattern: work the stiffened interlining, sew upper fabric and lining (NOT the interlining!) together at the front only, place it over the interlining and zig-zag the lining in place along the front, leaving the upper fabric loose.
 |
| Upper and lining sewn, just lining zig-zagged to interlining. |
Pin the hook and eye stuff to the lining + interlining very neatly so the closures are even with the edge. Sew on leaving the upper fabric untouched - you don't want all those stitches showing on your top layer.
 |
| Top layer folded back, closure exactly along the edge |
 |
| Eyes pinned, upper fabric untouched |
 |
| Hooks sewn (left and right of the hook and once in between) |
Then, only when the closure is sewn onto lining and interlining, you can either sew the neckline of lining and top layer from the back and turn over, or pin it from the right side, fold the upper fabric over the neckline and sew it by hand. I do the latter with the bottom front that goes over the skirt to smooth out all creases.
Ok, maybe I'll have to do yet another 1660s and take pictures of this process, using a fabric that's not black on black...
Proper pictures at last, this time WITH chemise (and himation, as the second ball's motto was "Olymp" and my charakter Eurydike). The himation is just a rectangle of fabric 2 x 1,50, black ribbon sewn two-faced all around the edges, pinned to shoulder and hip, pins hidden under lavishly layered bows (to use up the godforsaken ribbon that I really came to hate while trying to get straight seams with this stuff).


Subscribe to:
Posts (Atom)